ARCHLine.XP AI Render
How to use AI Render
Tips from Klaudia Aranyi
The ARCHLine.XP AI Render feature allows you to create quick and impressive renderings in various styles.
See Klaudia’s full presentation on the topic
Steps for visualization using ARCHLine.XP AI Render:
As a first step, I created the 3D model. I saved different views, as we do for normal renderings. Then I selected the view I wanted to render and uploaded it to AI Render.
I specified whether I wanted to render an interior or exterior scene and selected the rendering mode. You can choose between Exact mode and Creative mode.
In Exact mode, the result closely follows the 3D model. In Creative mode, artificial intelligence adds its own interpretation. Creative mode allows for exciting experimentation.
Next, I selected the rendering style I wanted. For interior images, I used the Realistic style, which produced photorealistic visual results that look like the real thing.
After that, I specified the type of room. If the type is not included in the list, I set it manually using prompts.
Finally, for interior scenes, you can also choose from different style categories.
It’s worth taking the time to work on the prompts — the more detailed you are about what you envision and the content of the 3D model, the better the results will be. Below you will find the prompts I used. They are quite simple, but sometimes I added additional commands to achieve the desired result.
BEDROOM
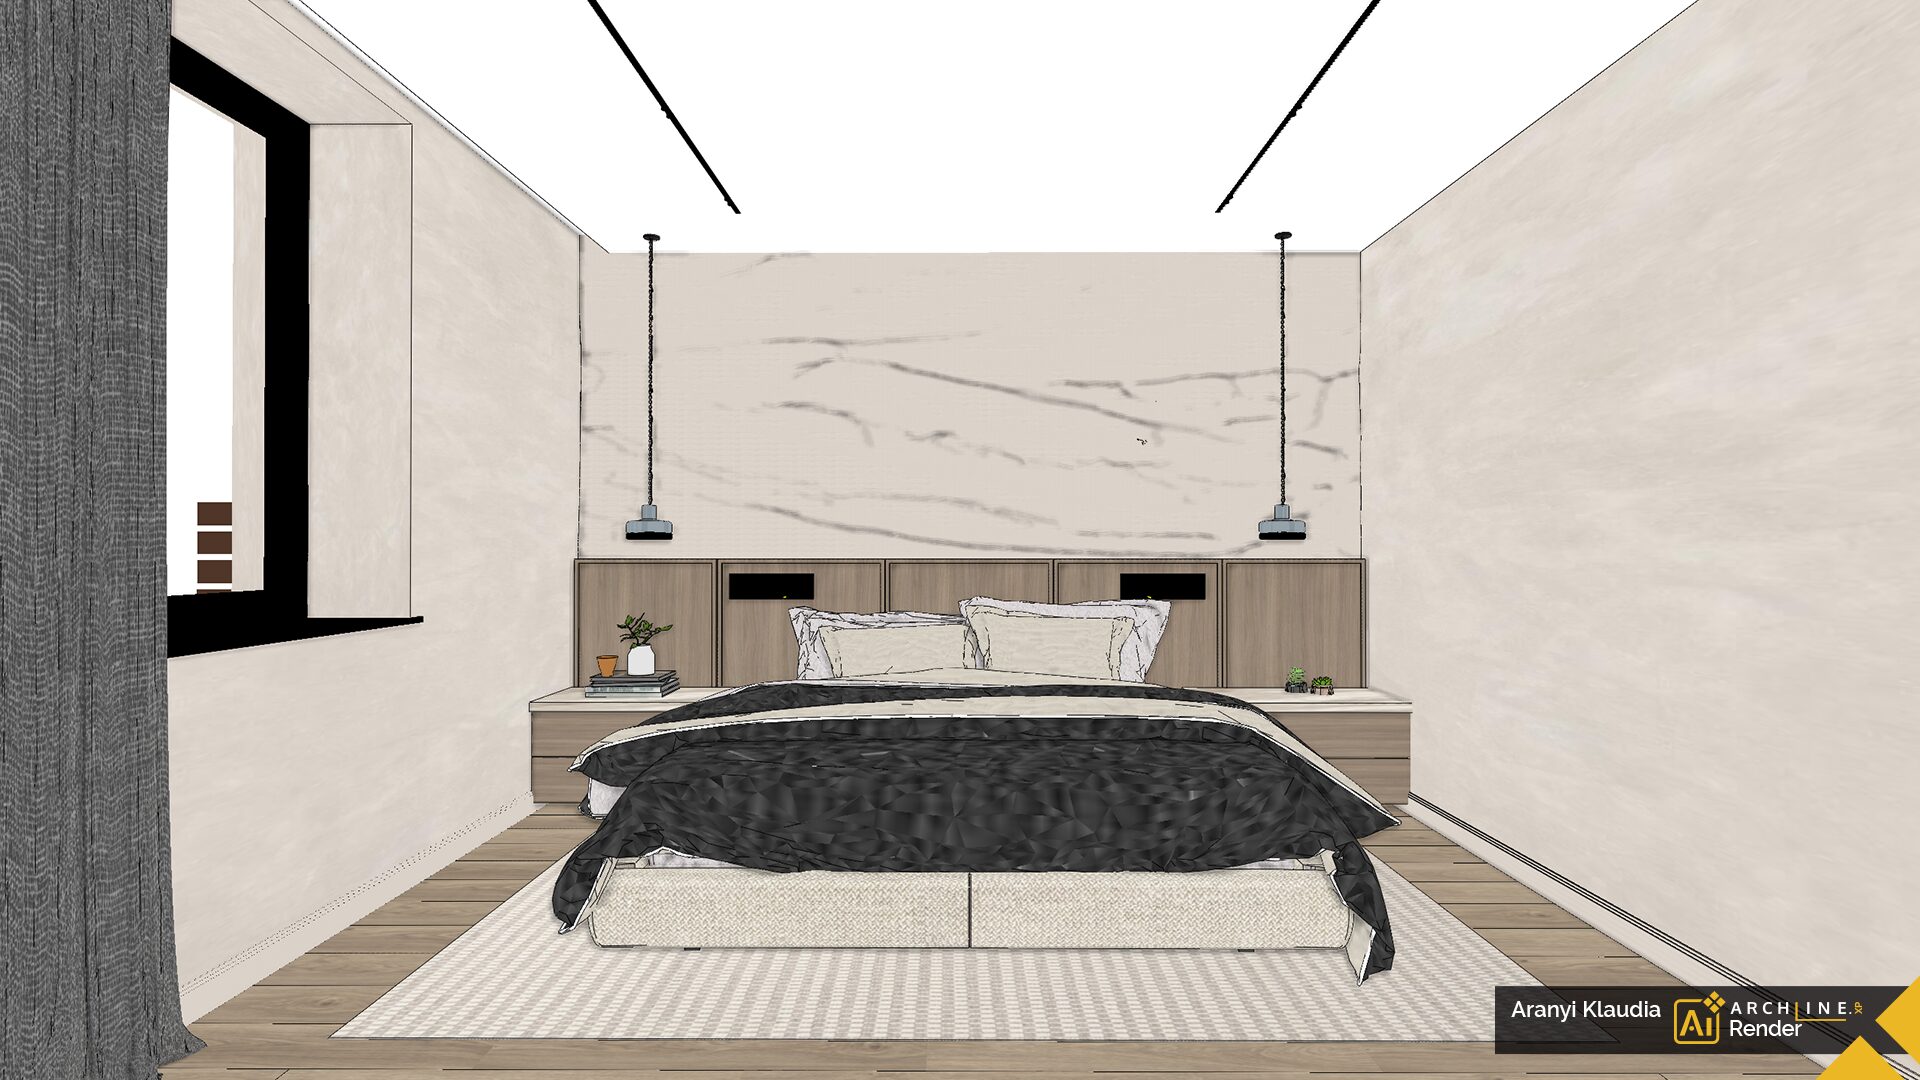
Instructions: Bedroom, wooden parquet flooring, beige walls, stone cladding and wooden panels at the back, concealed LED lighting behind the wall panel and spotlights on the ceiling.
The model was created in ARCHLine.XP.
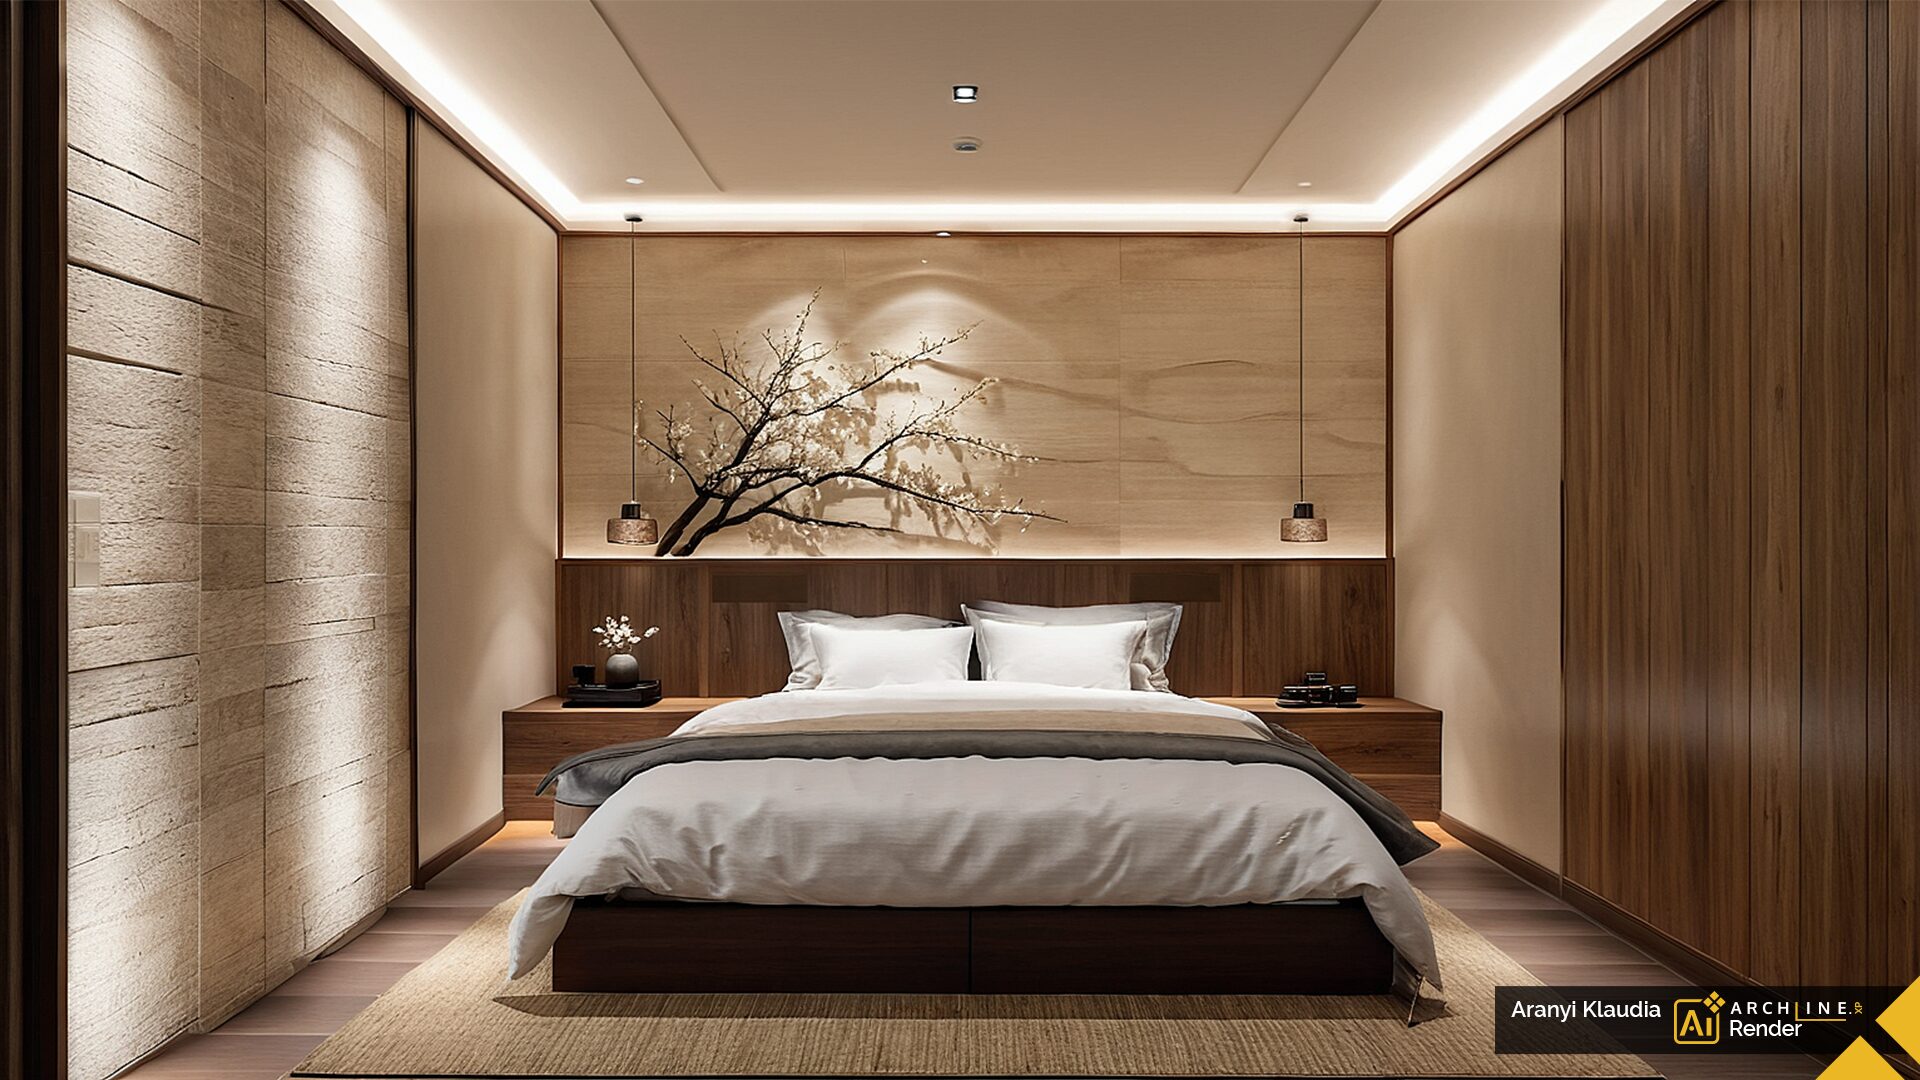
I selected the Japandi style in Creative mode. The AI “covered” the left window because of the curtain.
I switched to Exact mode to display the curtain, but the result was still not perfect. So, I deleted the curtain and used creative modes to try out different styles.
I tried the following styles: 4. Biophilic
I tried the following styles: 5. Modern
I tried the following styles: 6. Art Deco
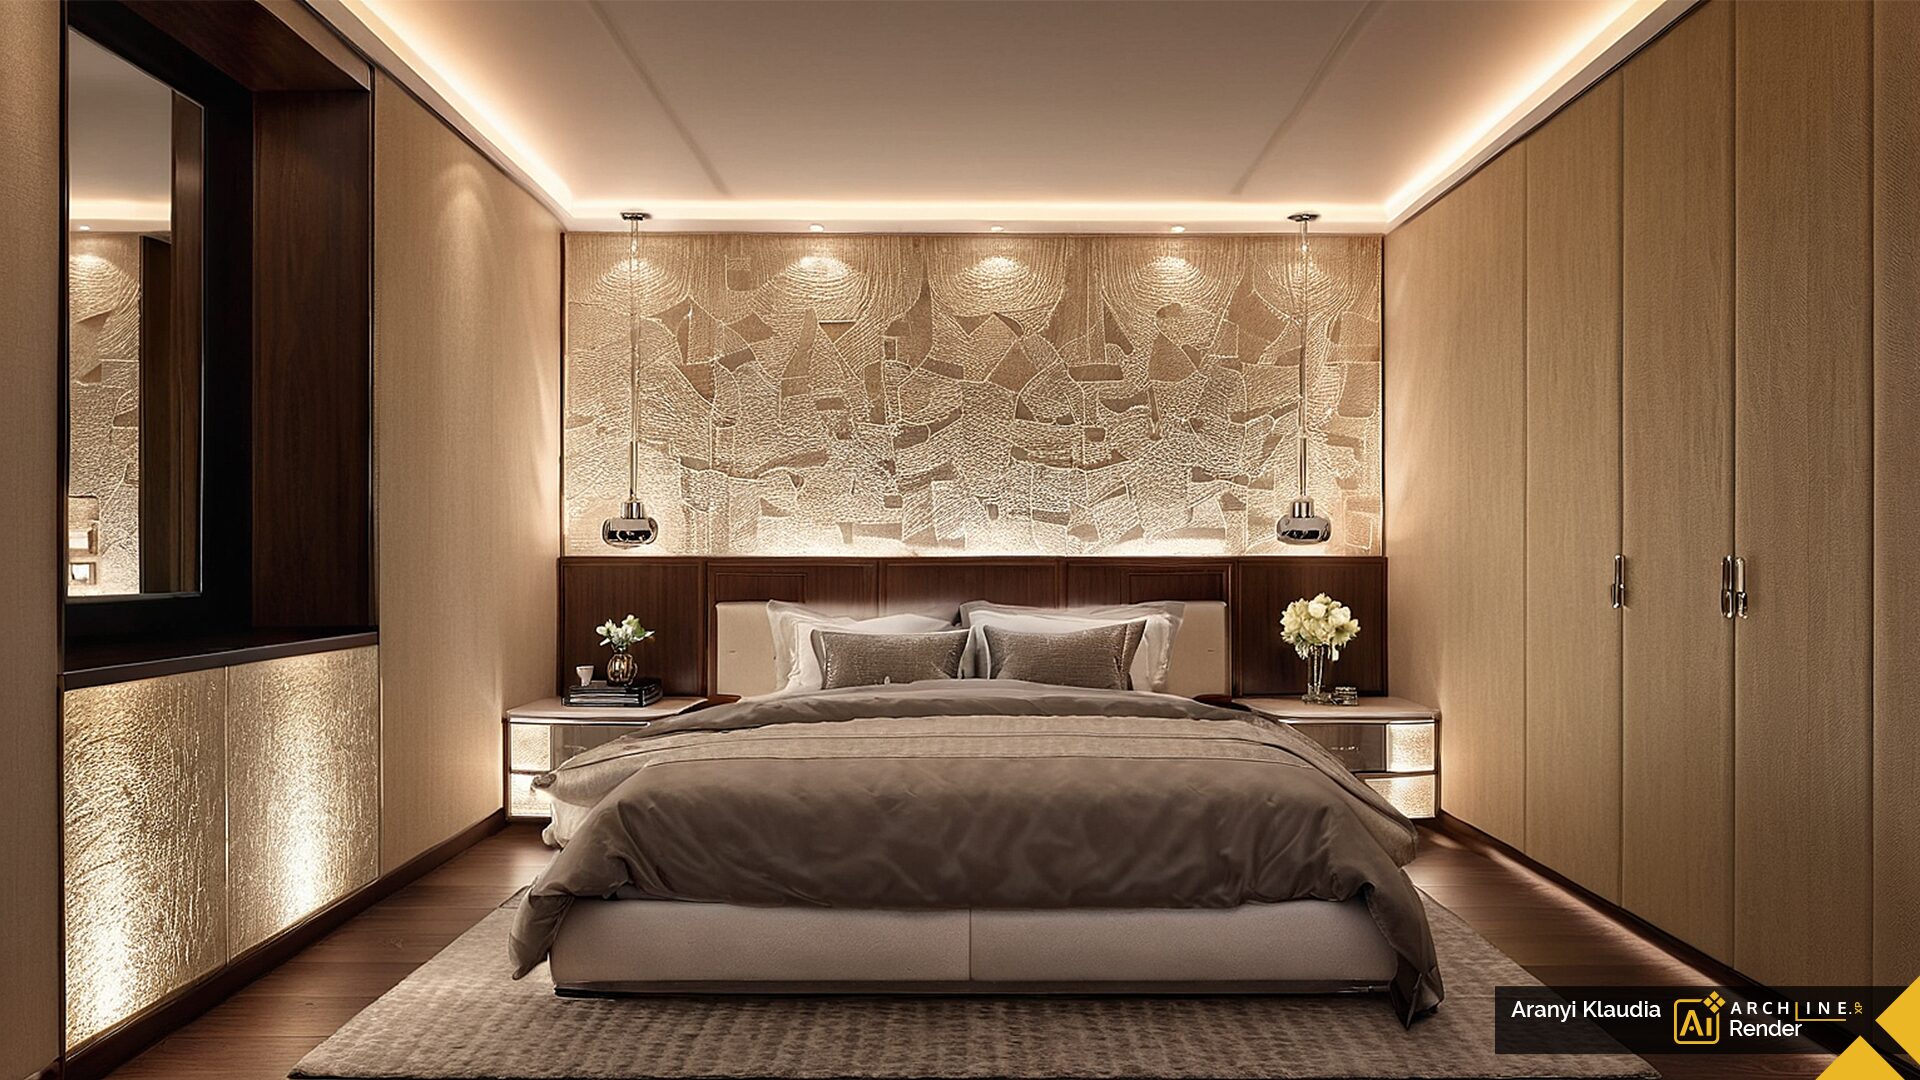
I tried the following styles: 7. Modern again.
I tried the curtain again, this time adding a hint: “Window on the left with sheer curtain.”
Figure 1: The model created in ARCHLine.XP.
Figure 2: I selected the Japandi style in the Creative mode. The AI “covered” the left window because of the curtain.
Figure 3: I switched to the Exact mode to display the curtain, but the result was still not perfect. So, I deleted the curtain and used the Creative modes to try different styles.
Images 4–7: I tried the following styles: 4. Biophilic, 5. Modern, 6. Art Deco, 7. Modern again.
Image 8: I tried the curtain again, this time adding the command: “Window on the left with transparent curtain.”
As you can see, by continuously improving the commands, you can achieve the result you want.
KITCHEN
The model created in ARCHLine.XP.
Depicted in creative mode with a Mediterranean style. Simple guidelines: warm colors, wooden parquet flooring, stone wall cladding.
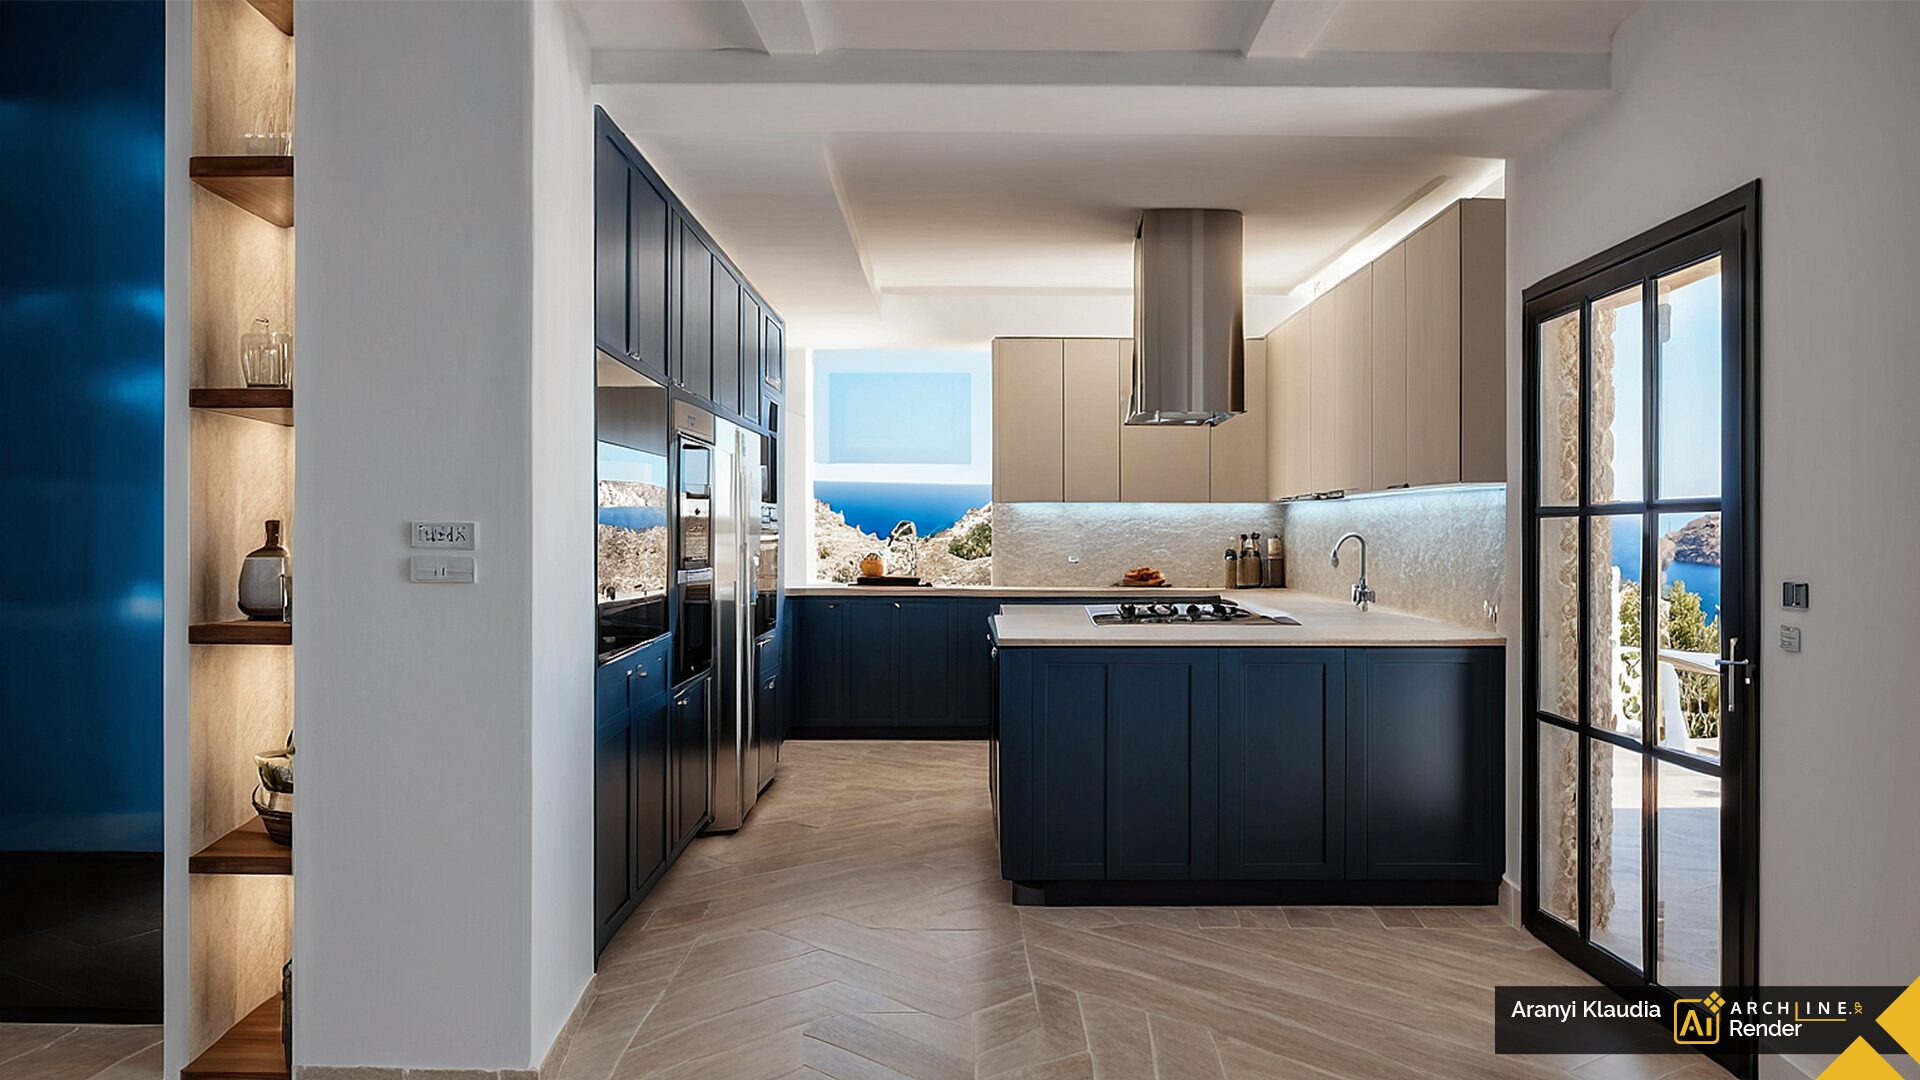
Displayed in Exact mode, Modern style, with the same prompts.
Figure 1: The model created in ARCHLine.XP.
Figure 2: Rendering in creative mode with Mediterranean style. Simple instructions: warm colors, wooden parquet, stone wall cladding.
Figure 3: Rendering in precise mode, modern style, with the same guidelines.
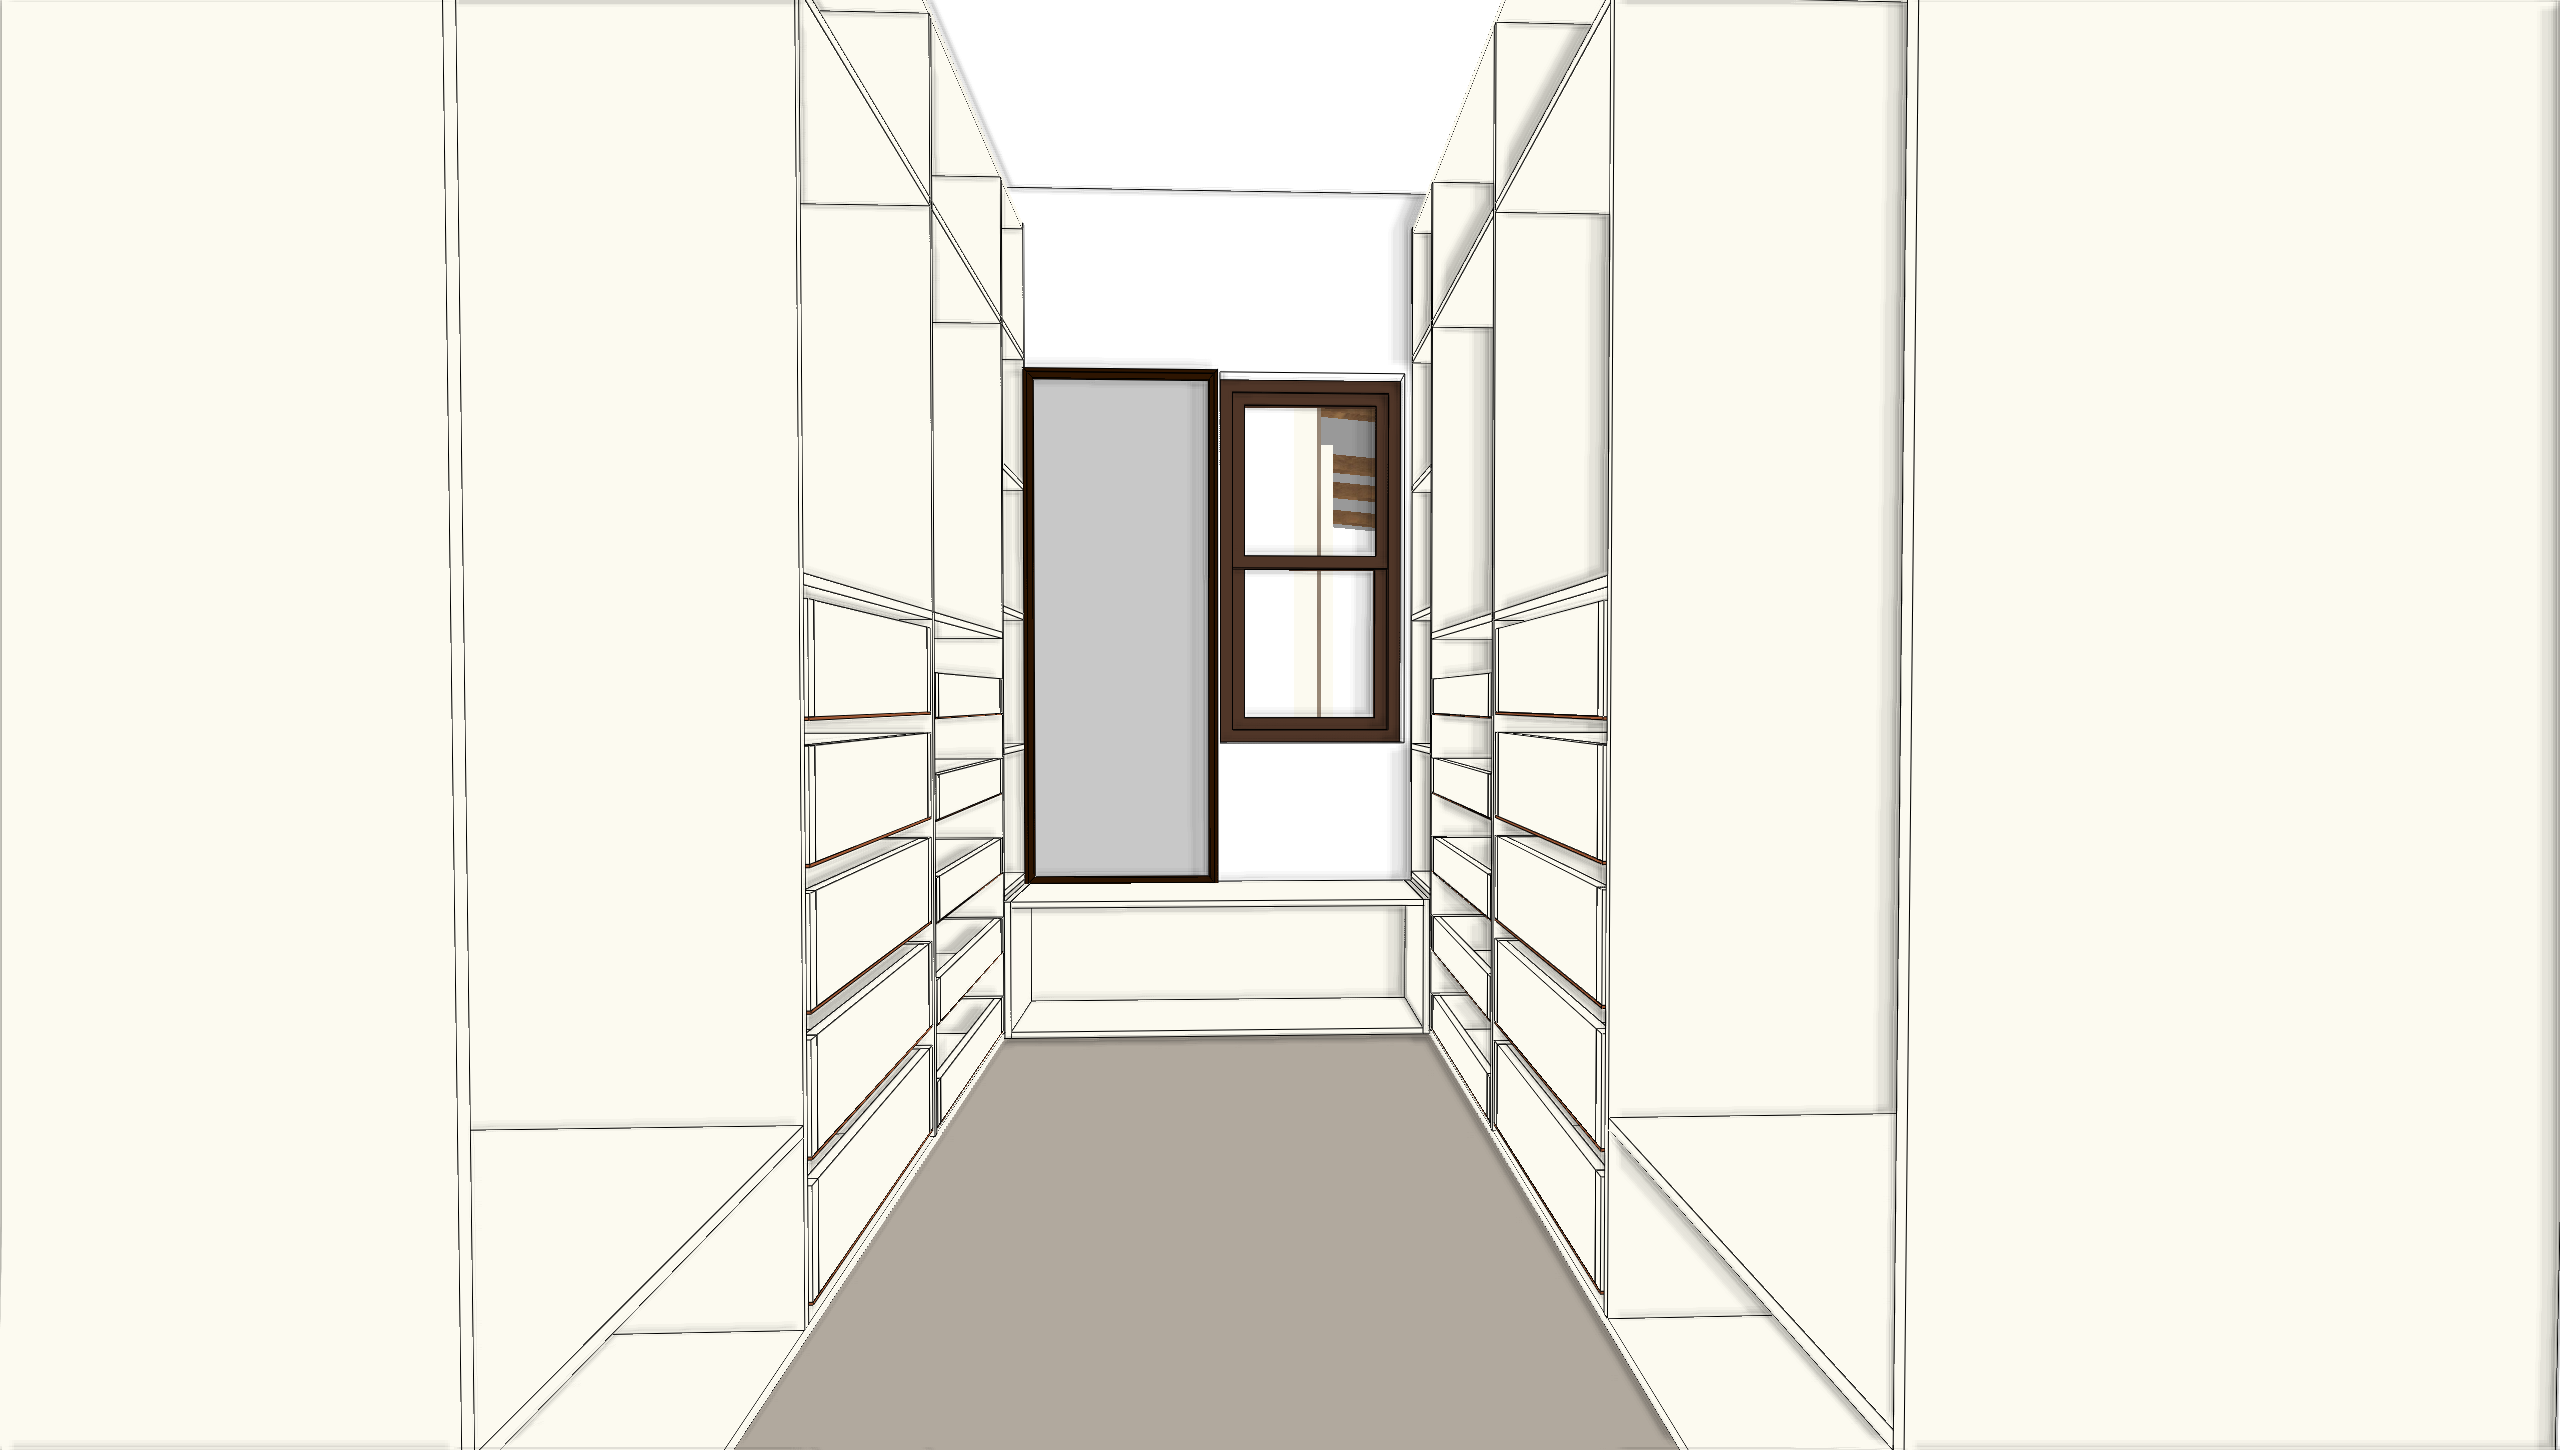
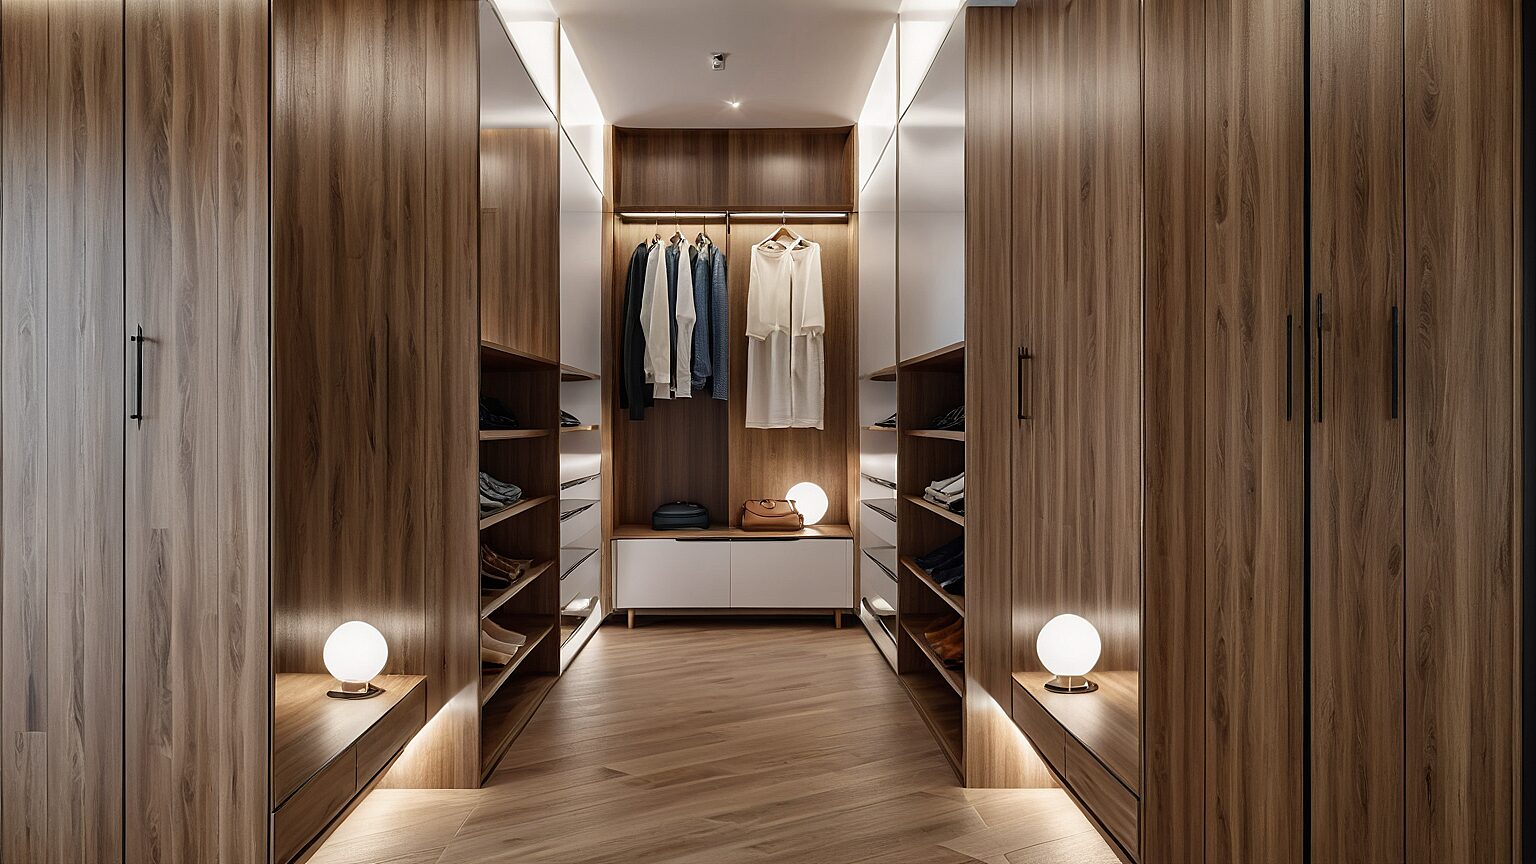
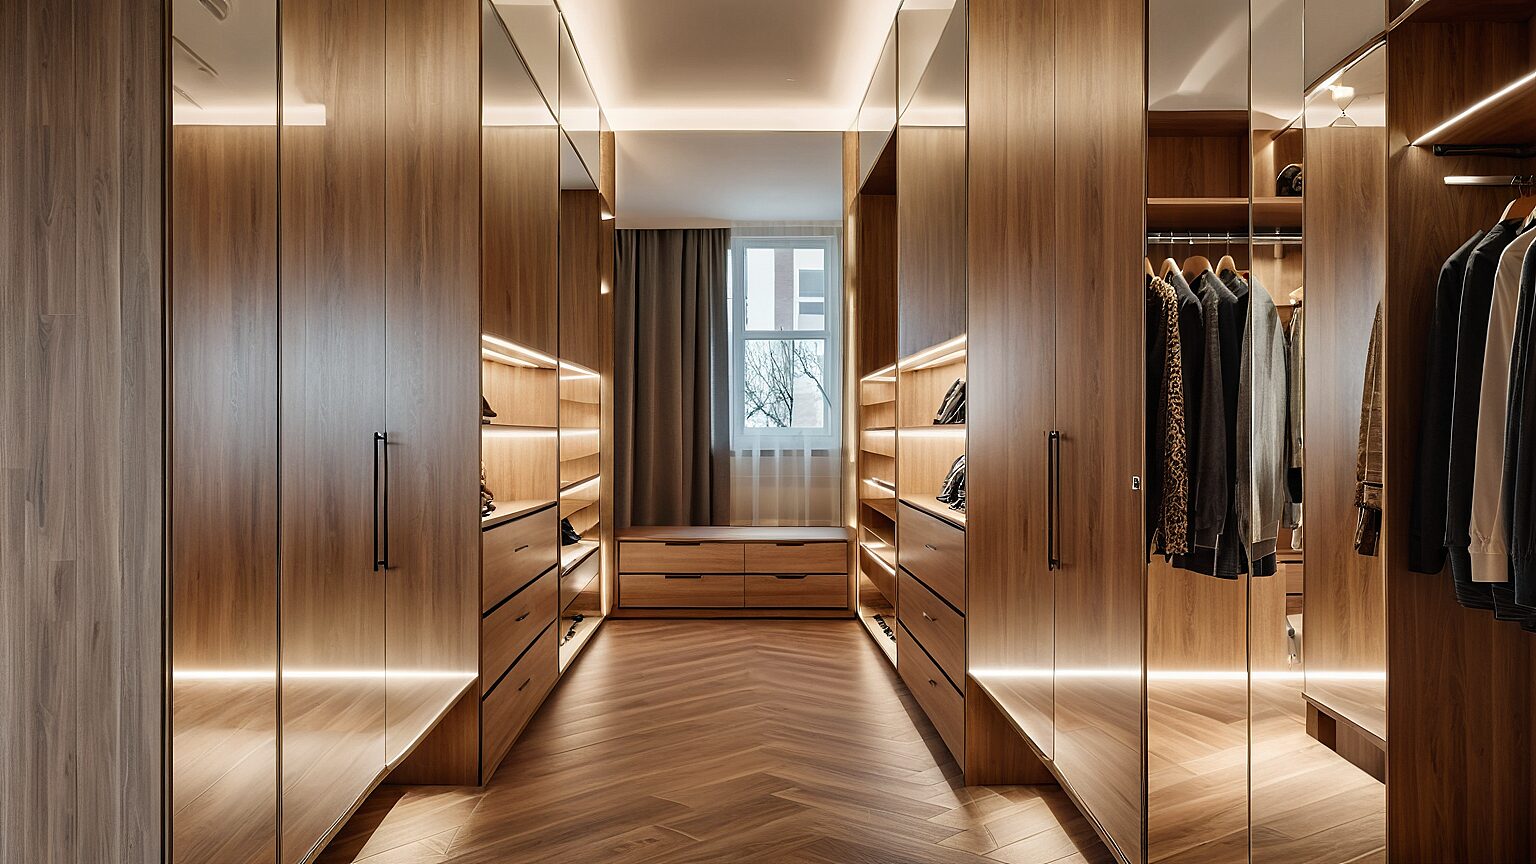
ACCESSIBLE WARDROBE
Simple instructions: Wooden parquet, clothes, decorative items, wooden materials, hidden lighting.
I wanted the images to have a modern style. Initially, I used the Creative mode, but it placed the furniture in front of the window.
So, I added a guideline specifying: “There is a window directly opposite.” Then I rendered the next image again in Creative mode. As you can see, adjusting the instruction helped keep the space in front of the window free.
Simple suggestions: Wooden parquet flooring, clothing, decorative items, wooden materials, hidden lighting.
I wanted the images to have a modern style. Initially, I used the Creative mode, but it placed furniture in front of the window.
So, I added a hint that clarifies: “There is a window directly opposite.” Then, I rendered the next image again in creative mode. As you can see, adjusting the hint helped keep the area in front of the window clear.
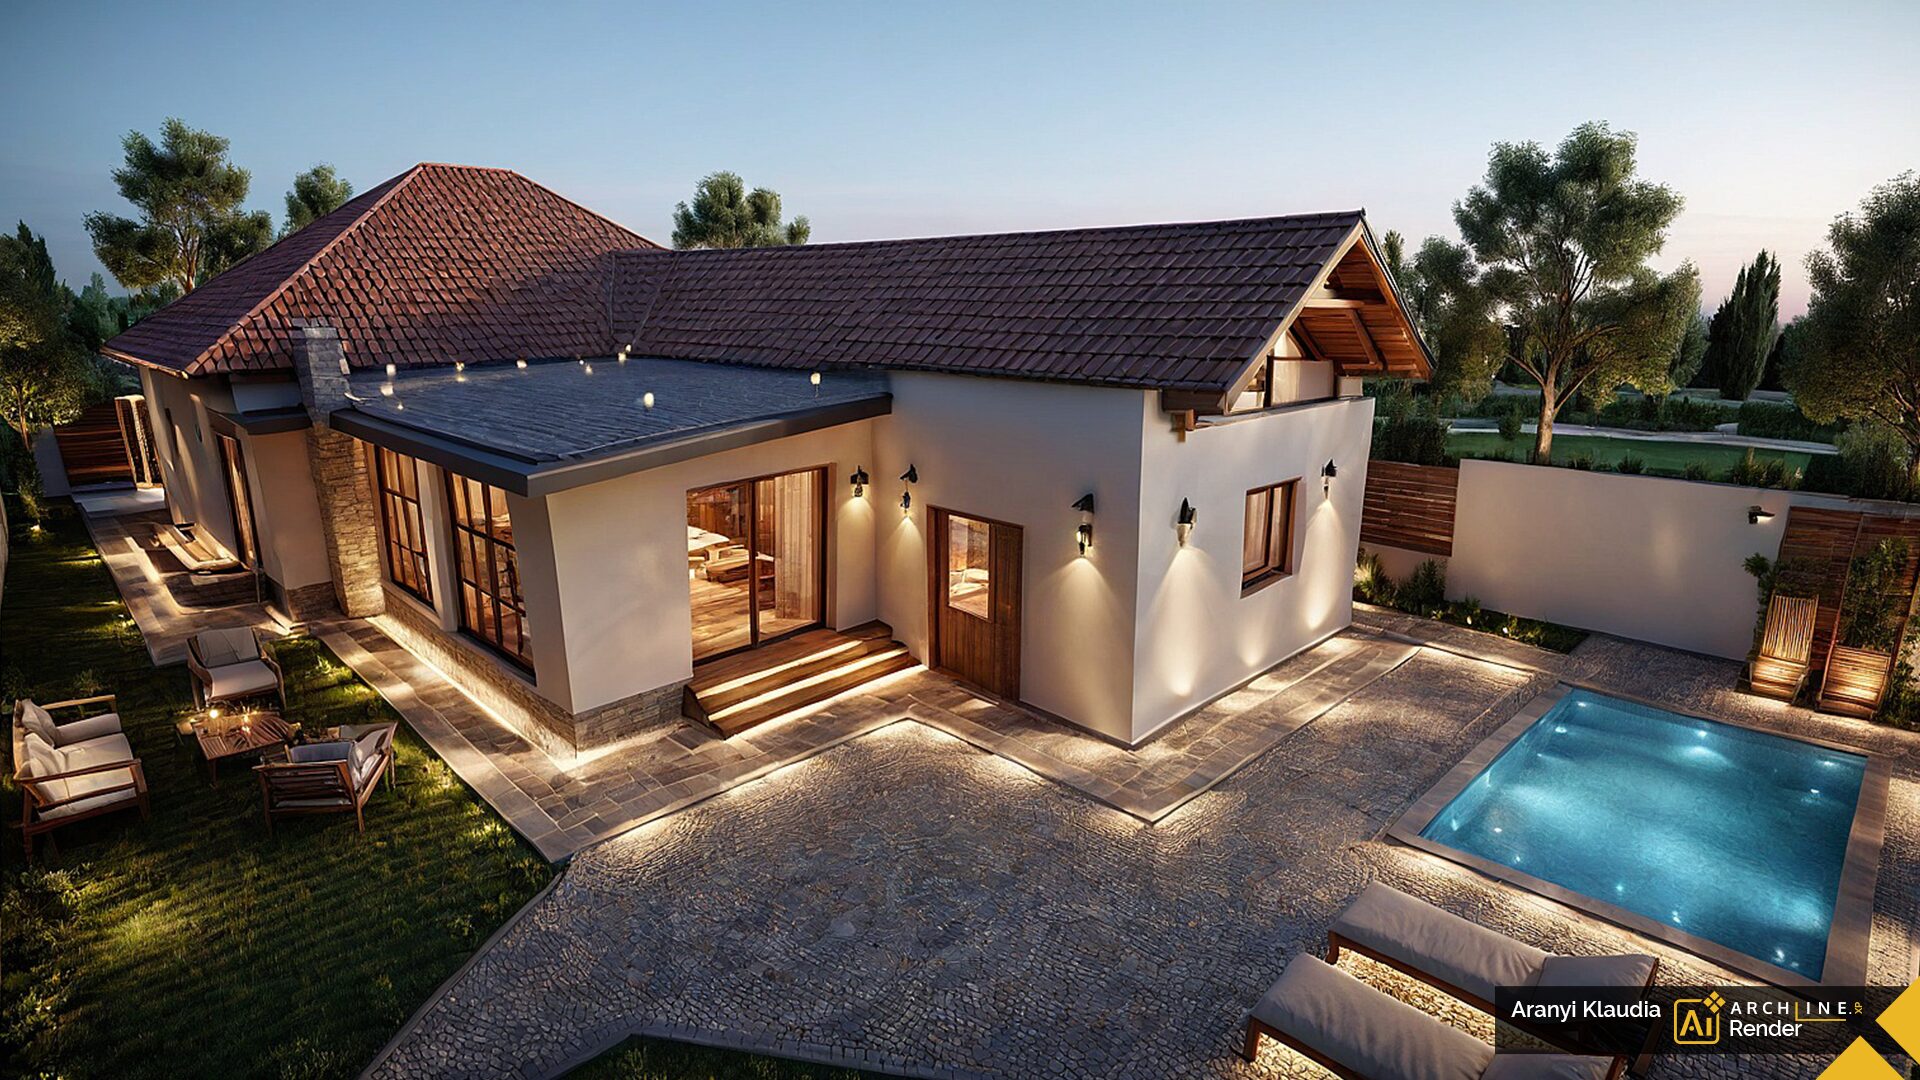
For outdoor scenes, it is particularly important to describe what the image should show.
Select the rendering mode (Creative or Accurate) and the image type.
In the examples below, I chose the Photo image type, but you can achieve interesting results with other types as well.
I used the Realistic and Night scene styles.
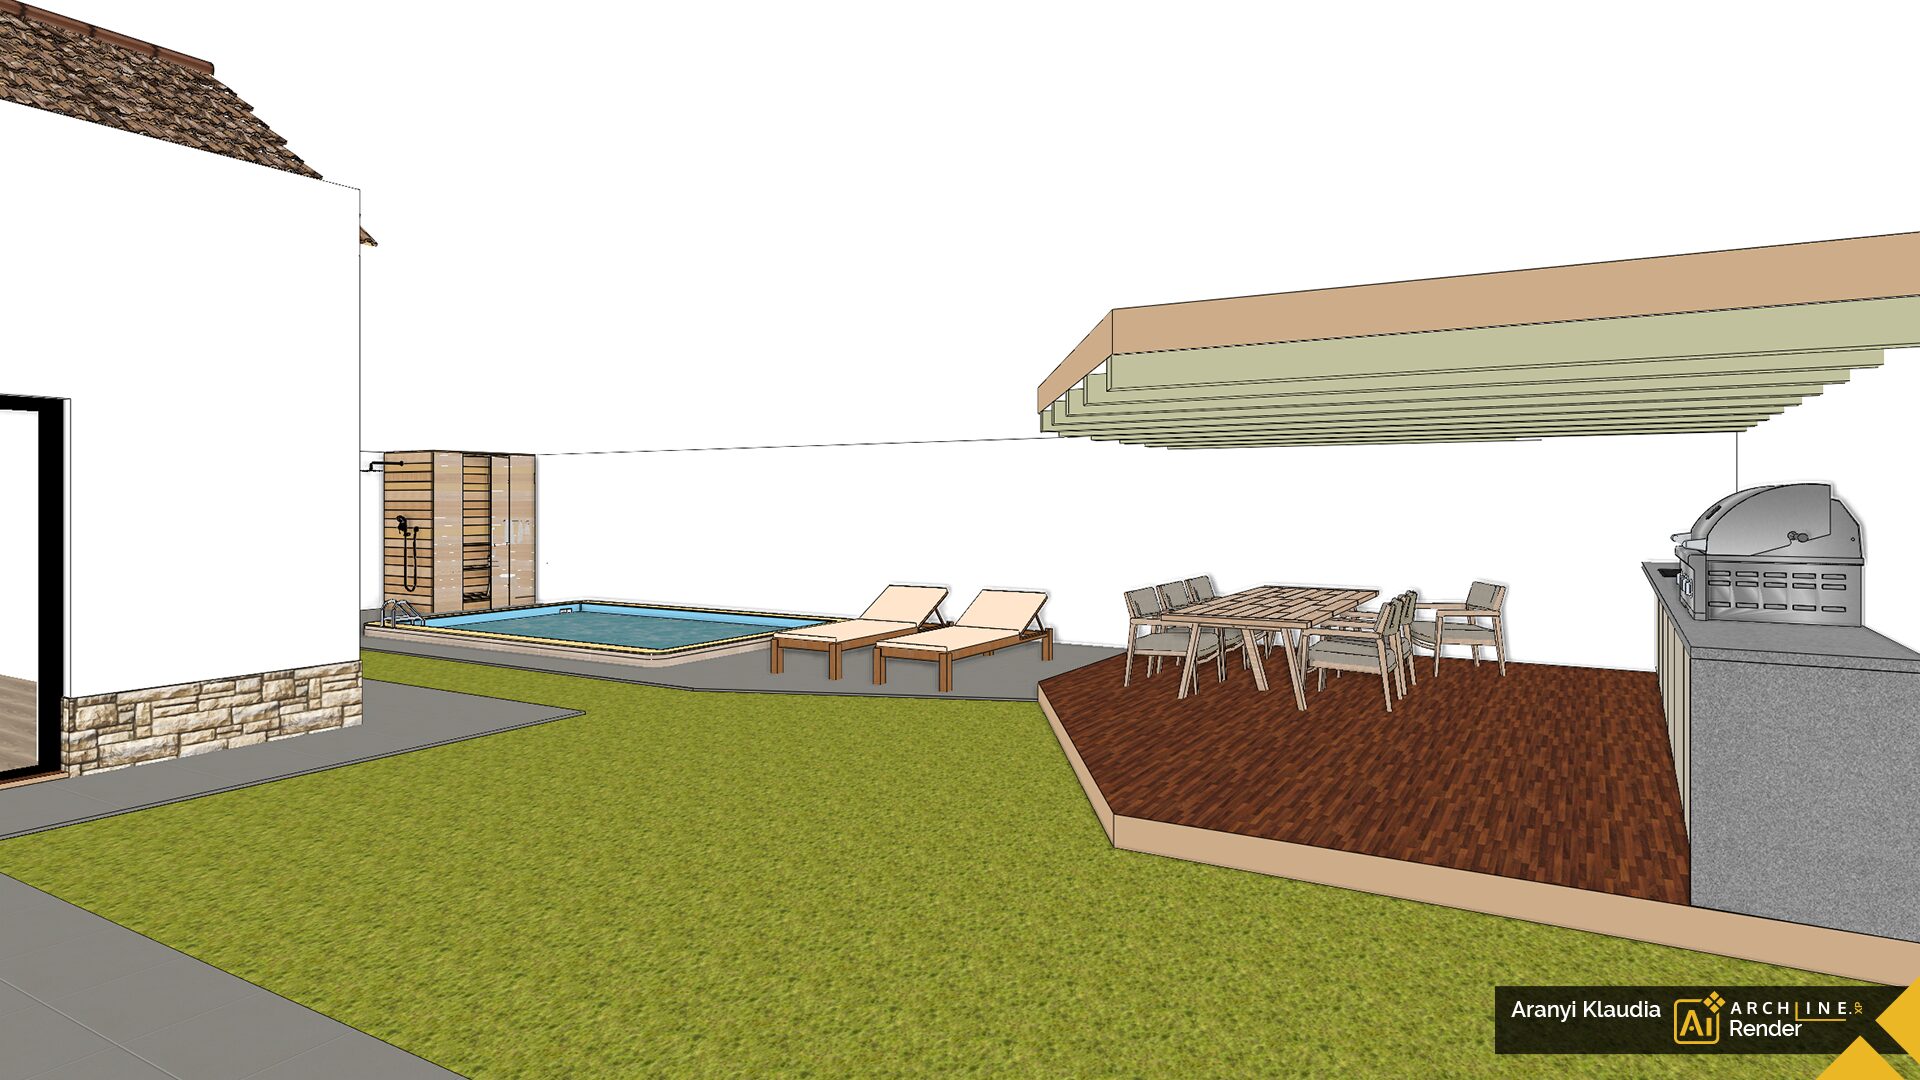
EXTERIOR 1
Directions:
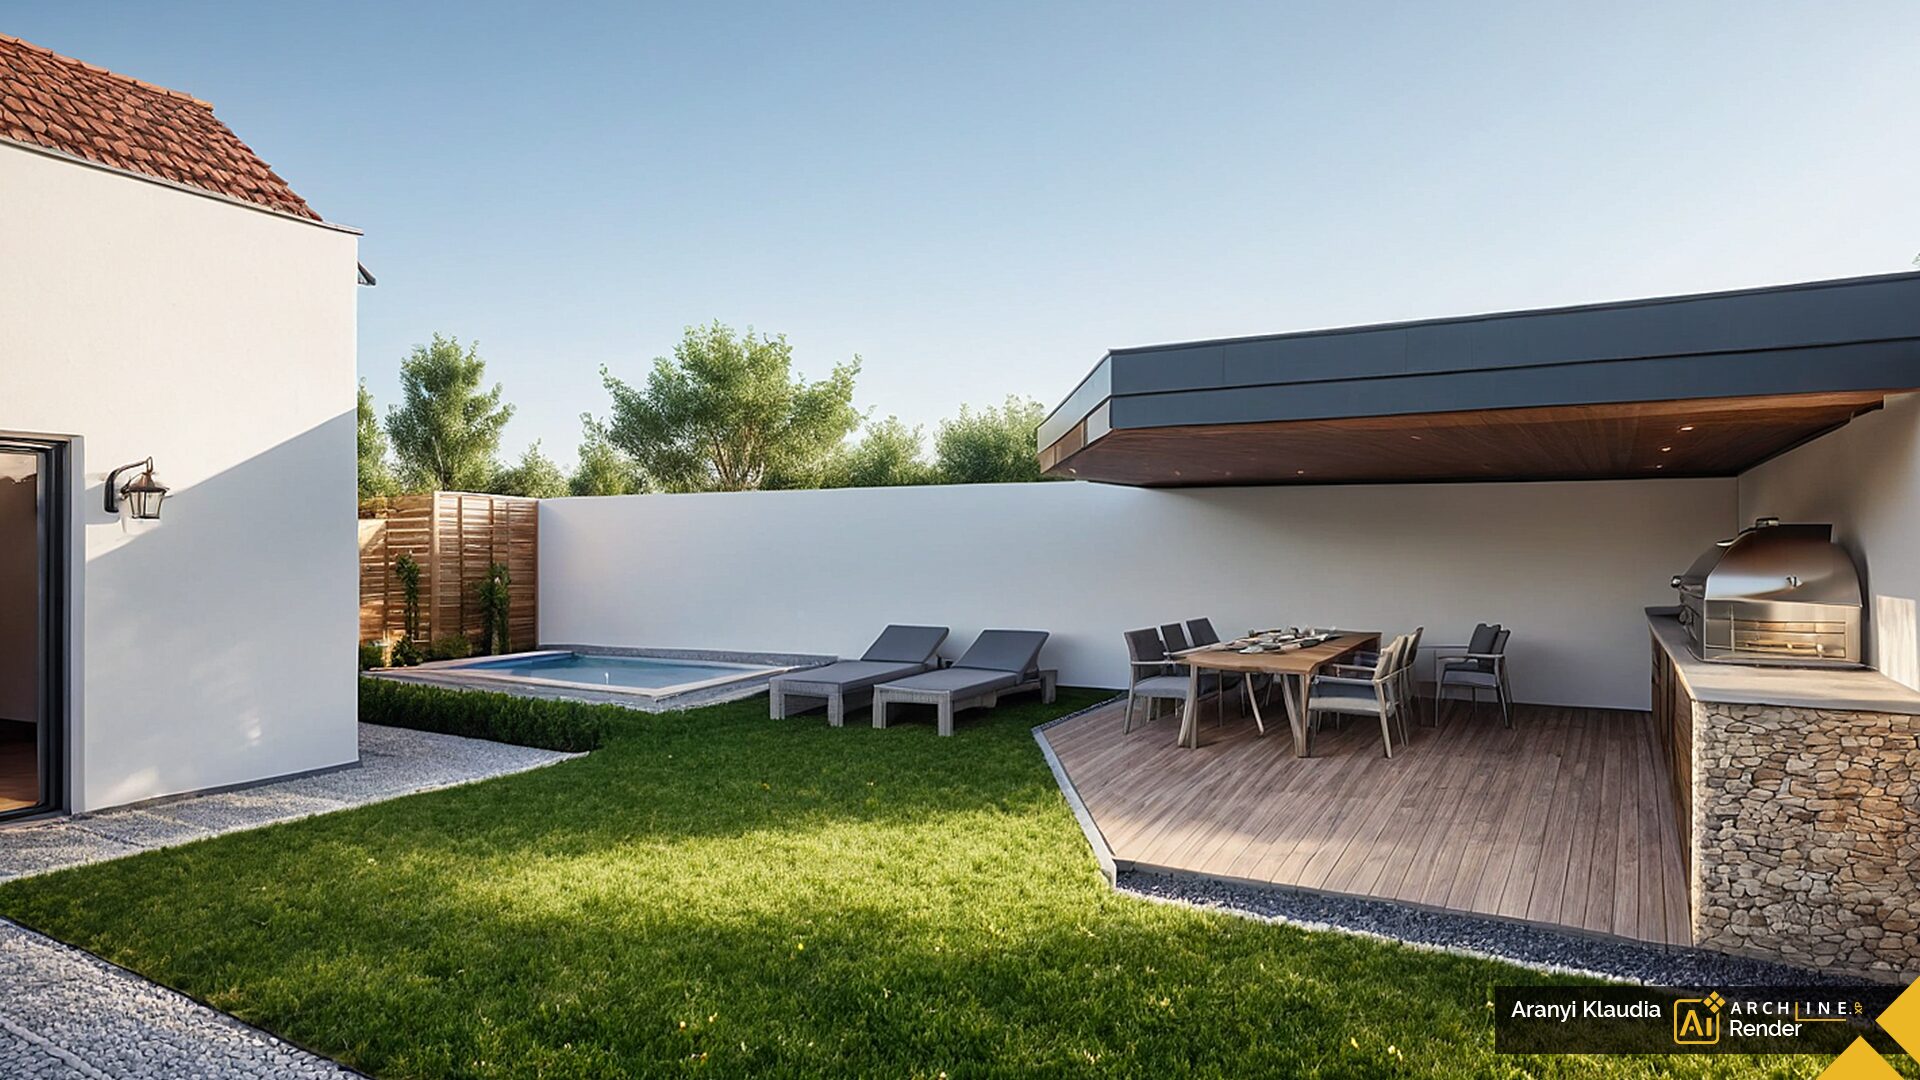
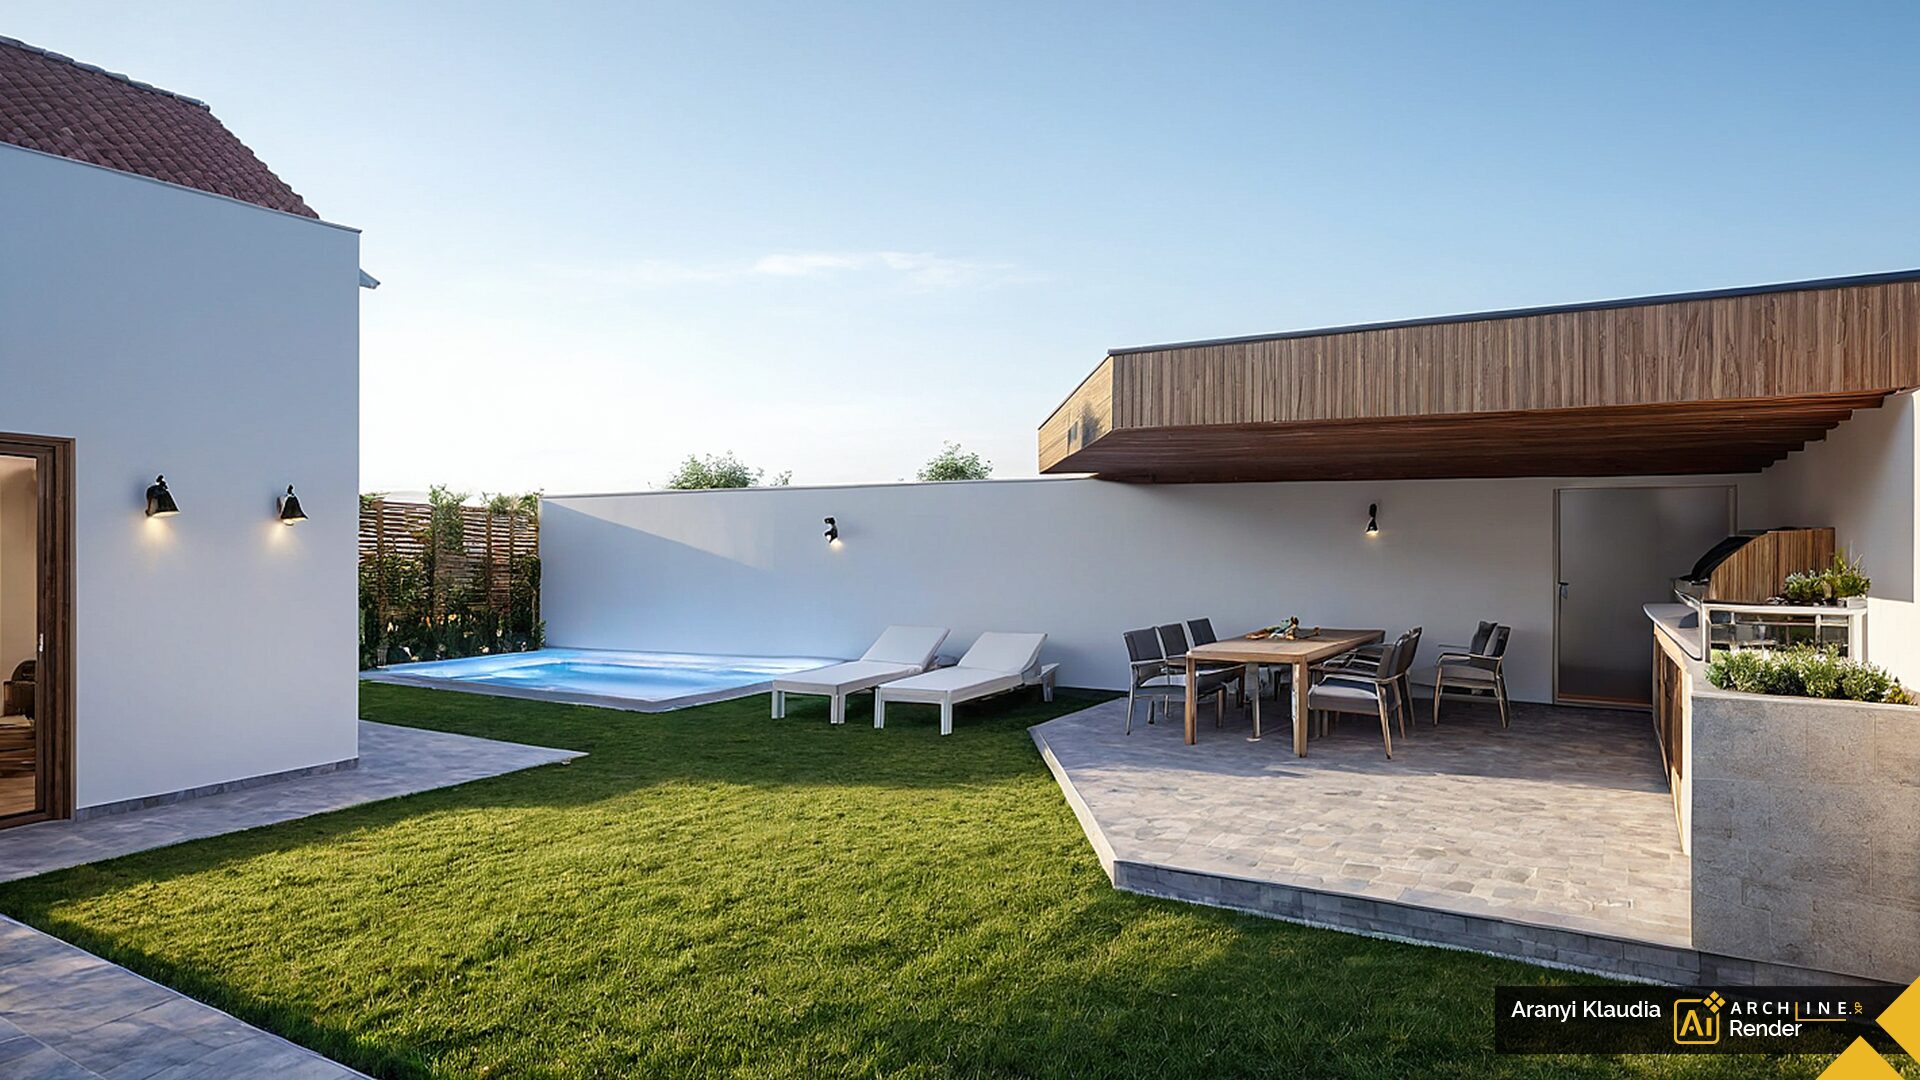
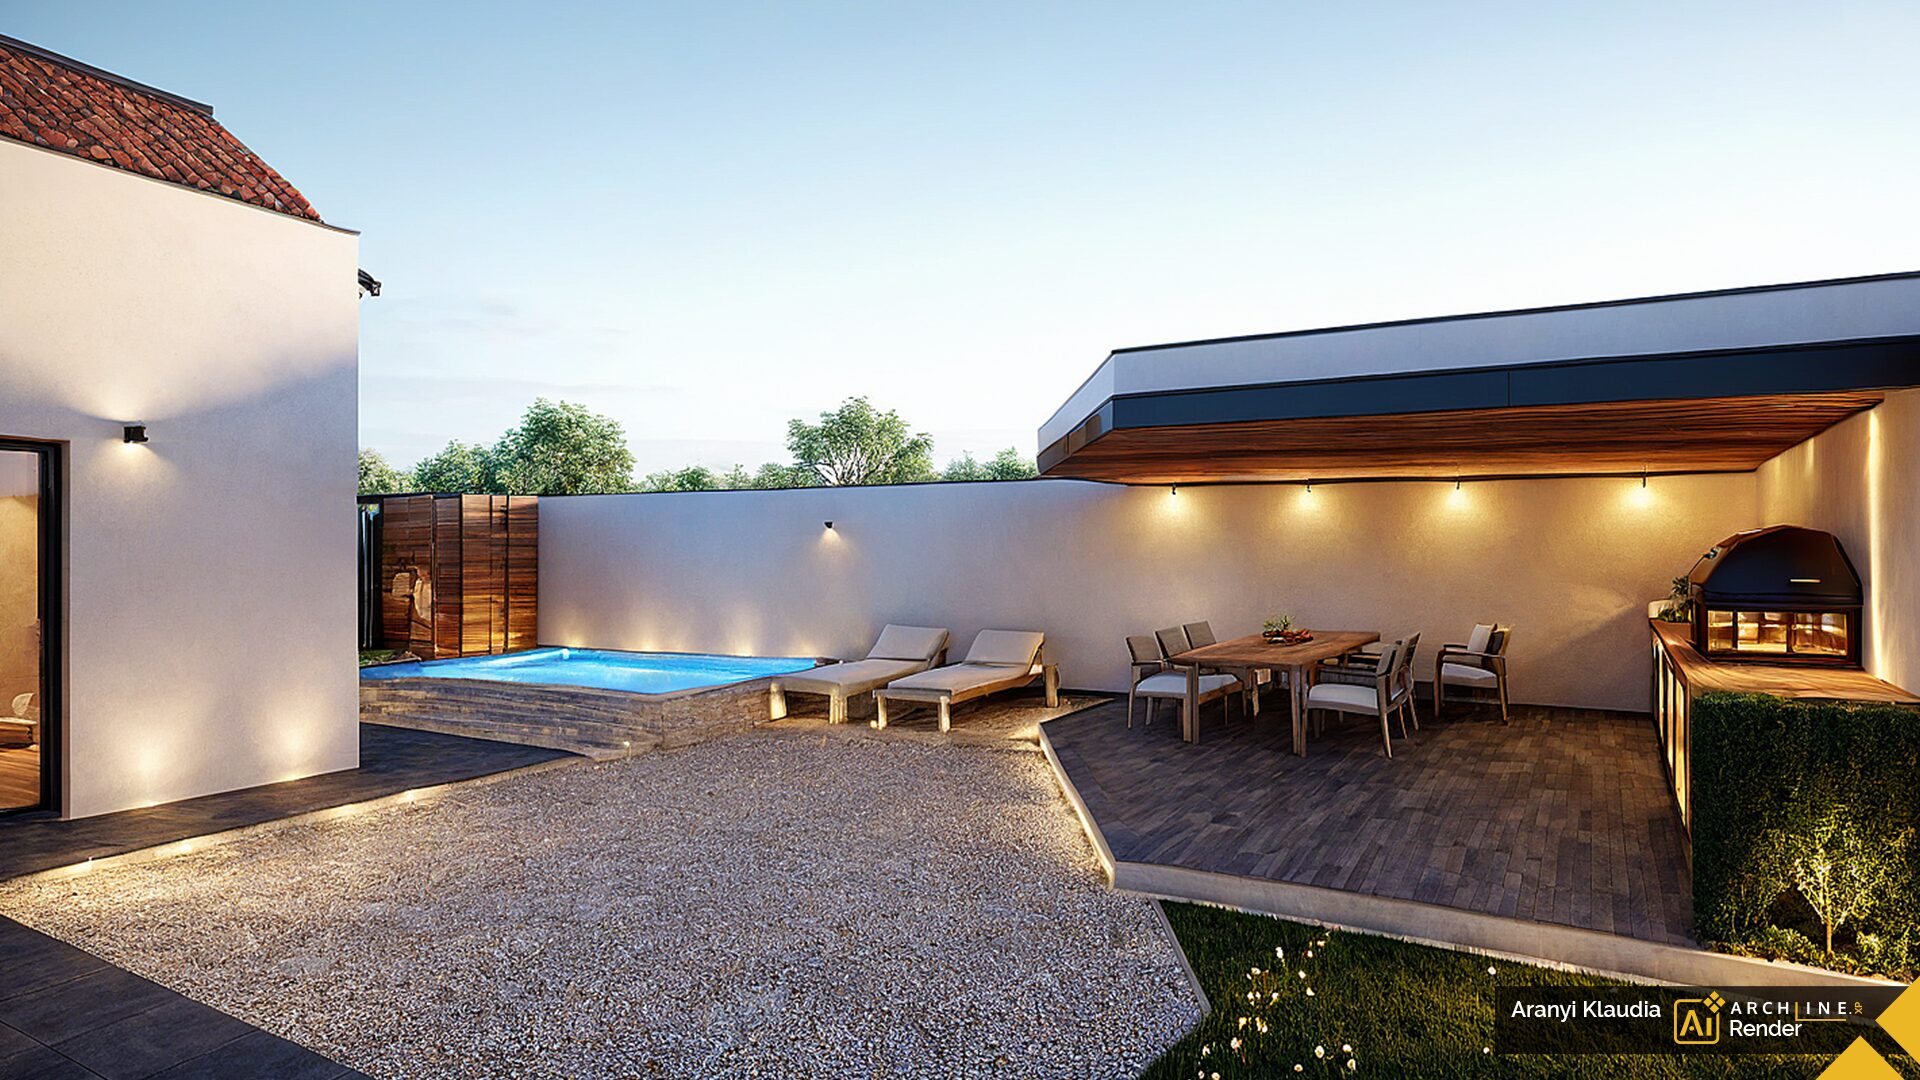
Scene in a garden, cooking area under a gazebo, swimming pool nearby, lawn, paved walkway, Mediterranean roof, black window frames, trees in the background.
The model created in ARCHLine.XP.
A realistic picture of the day rendered in creative mode.
Same settings, but I added to the command: “Include lighting in the scene.”
I only changed the style to a night scene.
Figure 1: The model created in ARCHLine.XP.
Figure 2: A realistic image of the day rendered in creative mode.
Figure 3: Same settings, but I added the command: “Include lighting in the scene.”
Figure 4: I only changed the style to night scene.
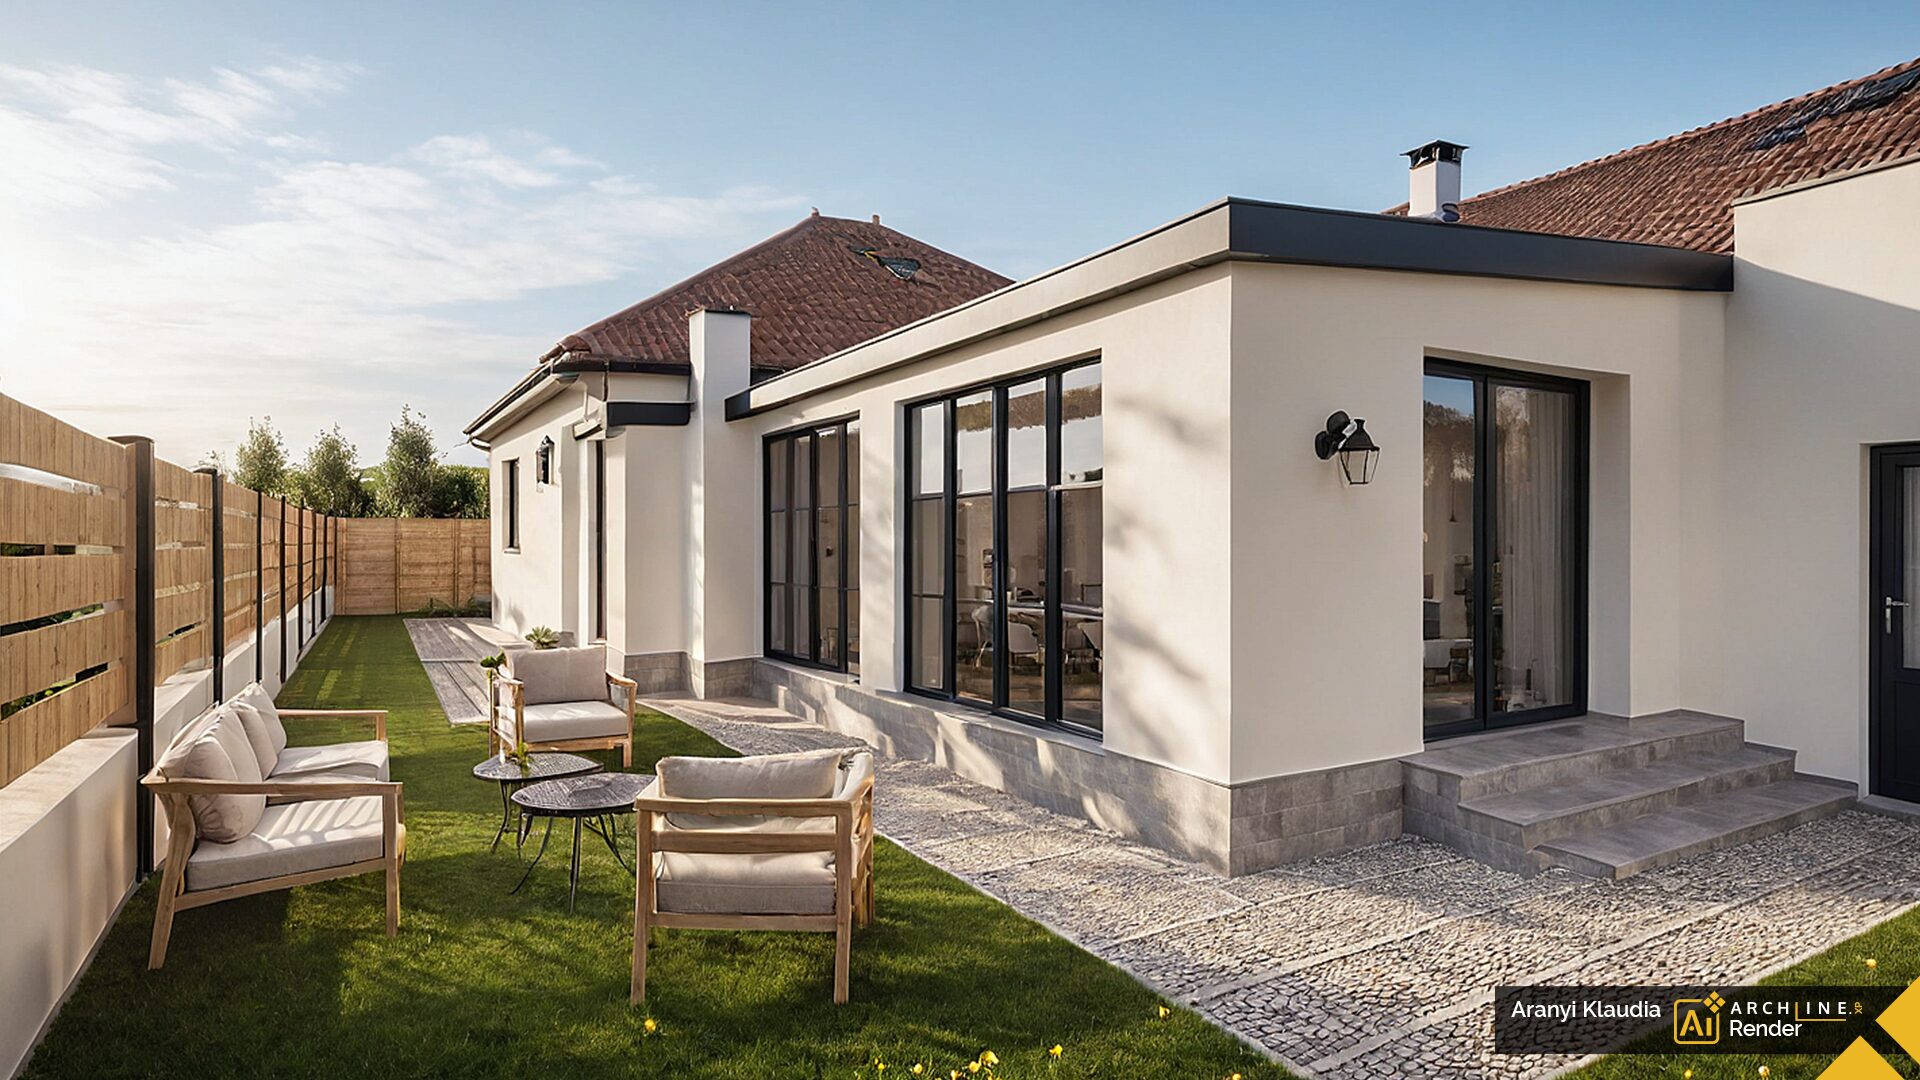
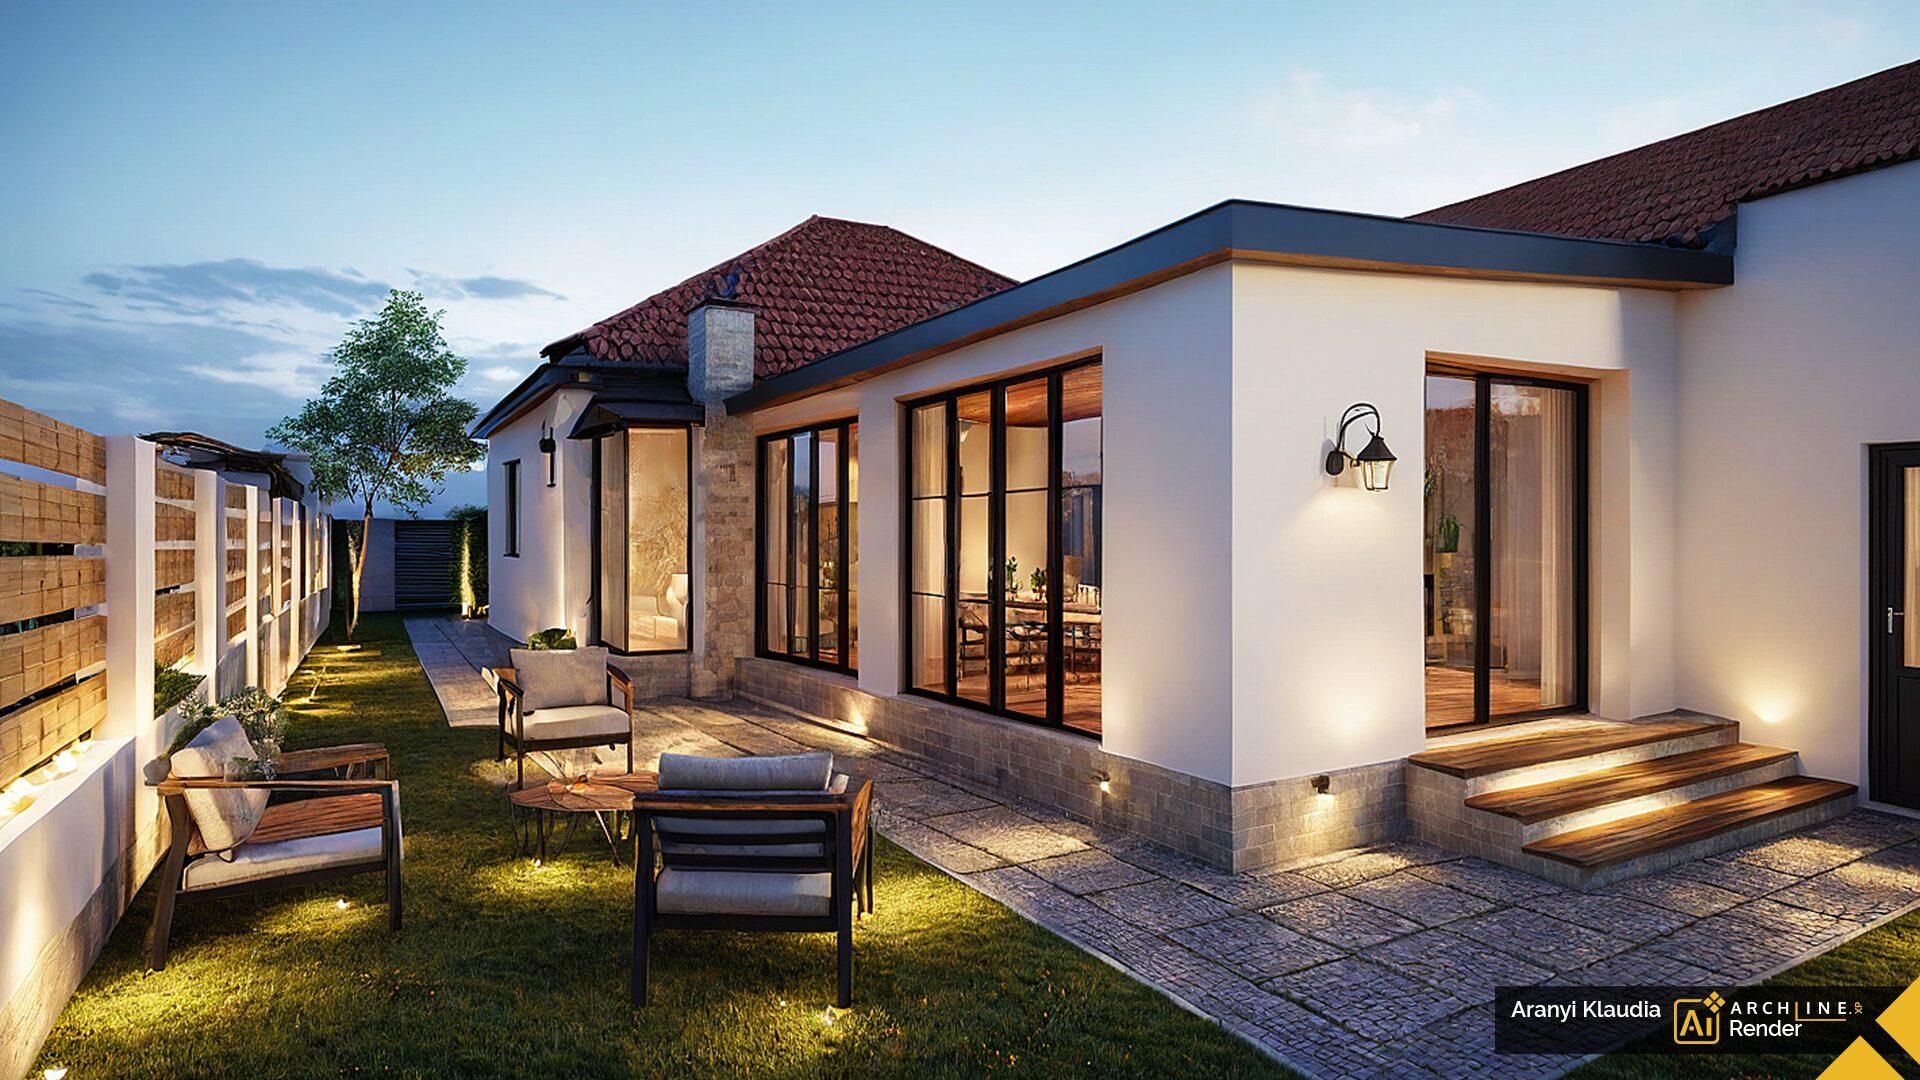
EXTERIOR 2
Cues:
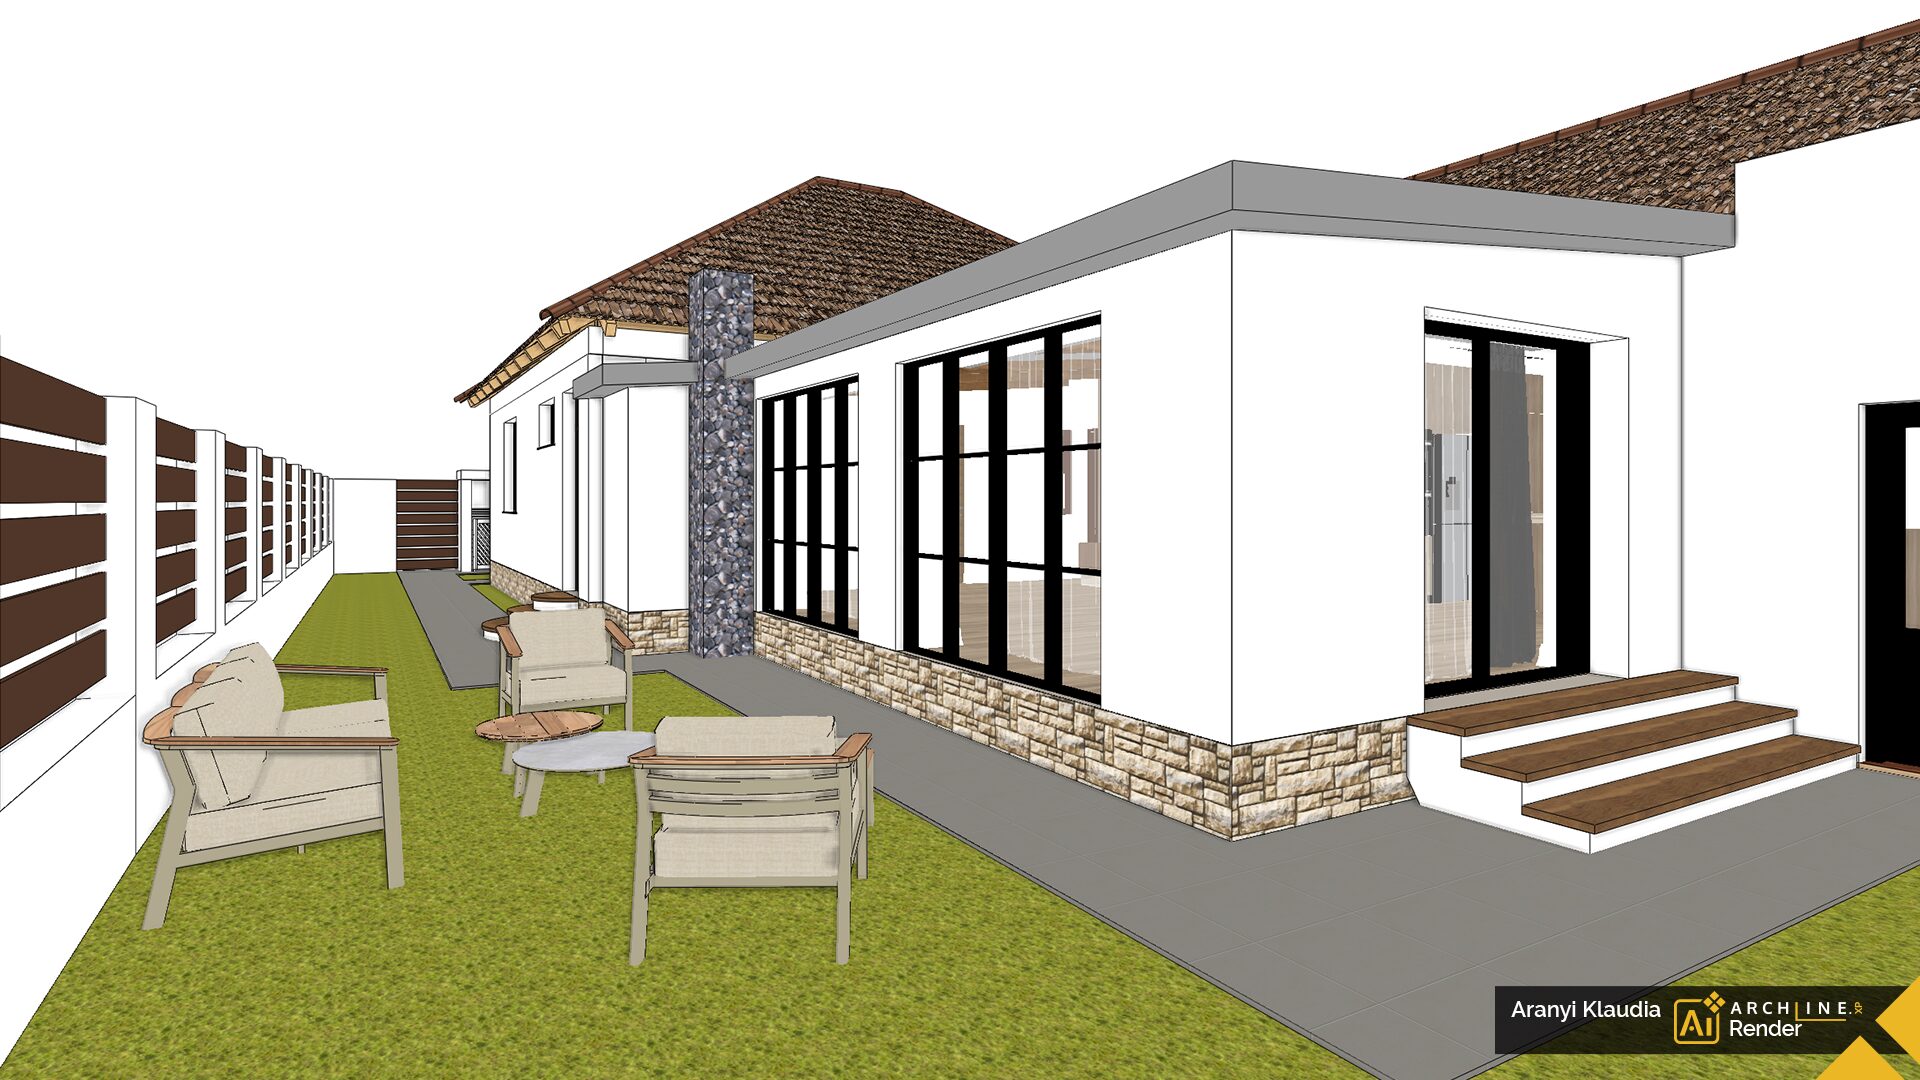
Scene in a garden, lawn, paved walkway, flowers, Mediterranean roof, black window frames.
The model created in ARCHLine.XP.
Realistic style, daytime scene.
Change to night scene and add to command: “Lights and lanterns on the wall.”
Figure 1: The model created in ARCHLine.XP.
Figure 2: Realistic style, scene during the day.
Figure 3: Change to night scene and addition to the command: “Lights and lanterns on the wall.”
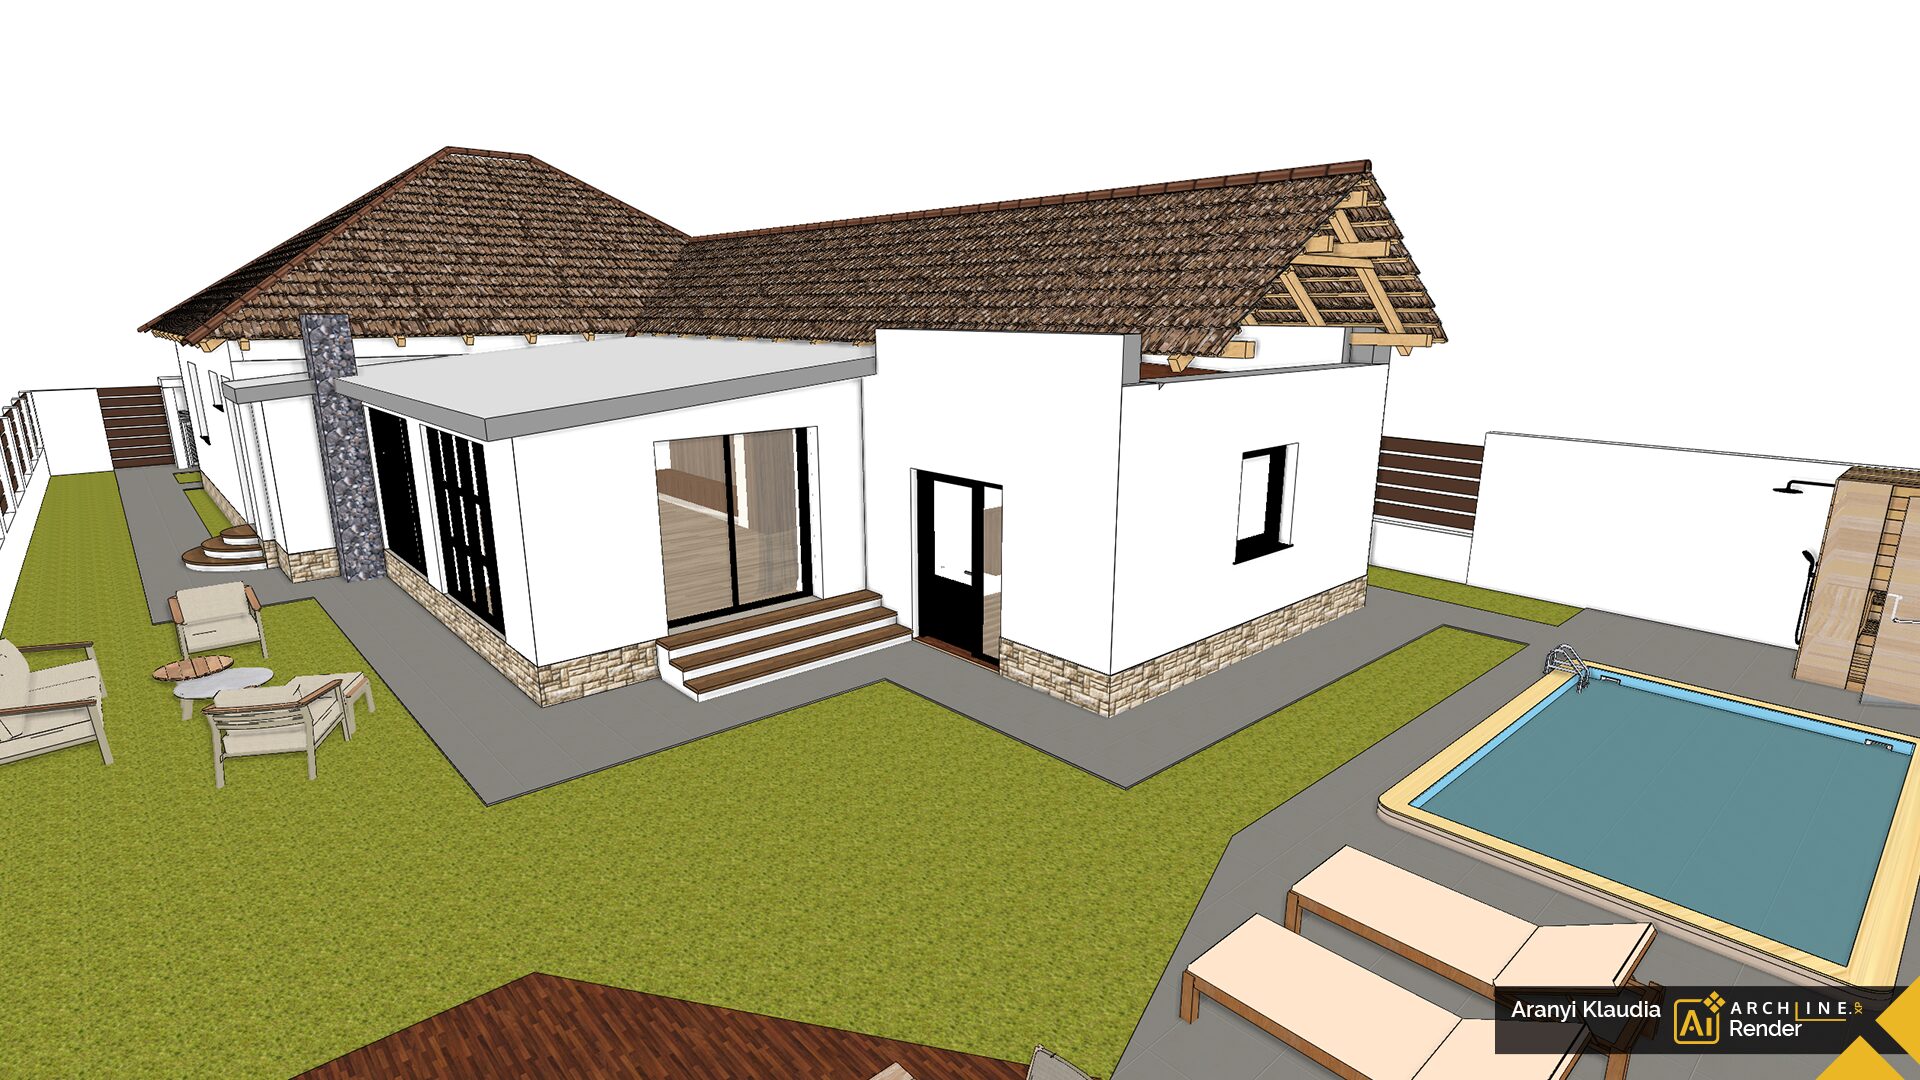
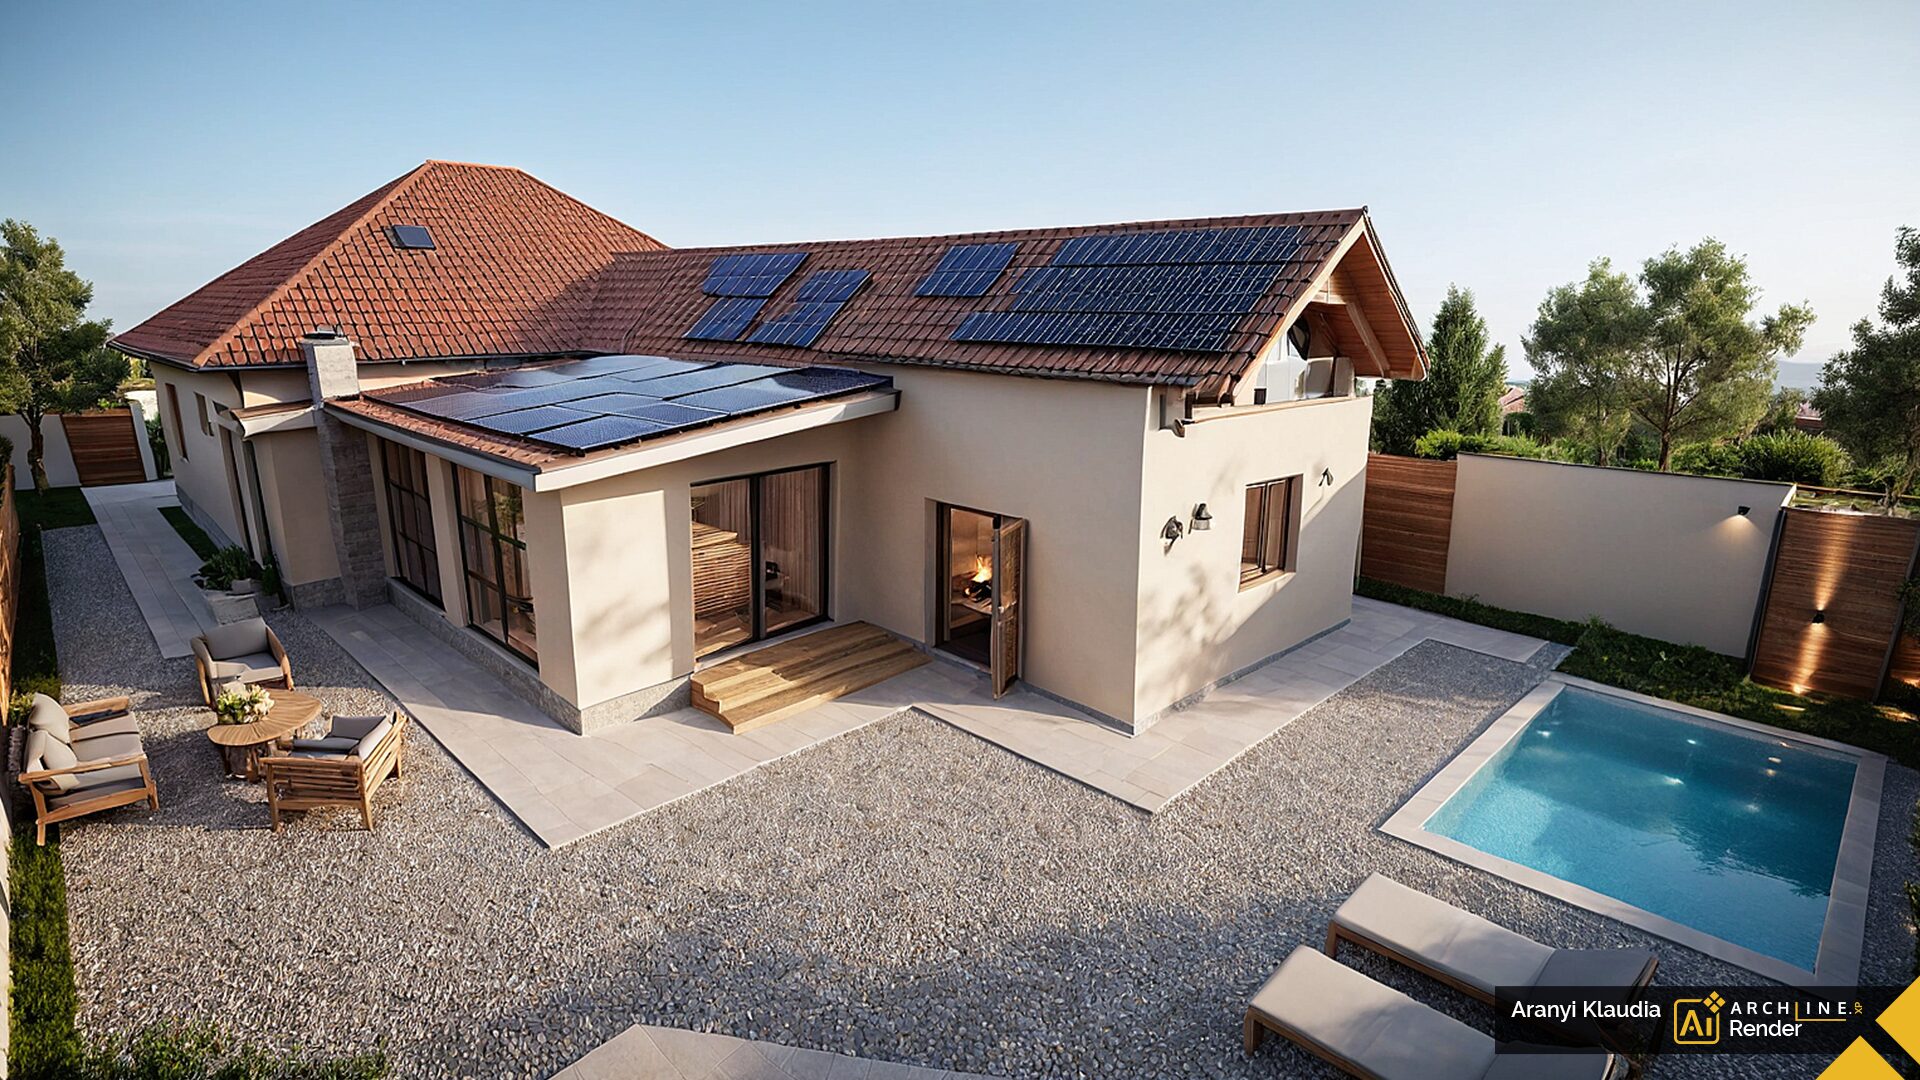
EXTERIOR 3
Notes:
Scene in a garden, swimming pool, sun loungers, lawn, paved walkway, Mediterranean roof, black window frames.
The model created in ARCHLine.XP.
Realistic style, daytime scene.
Change to night scene and add to command: “Lights and lanterns on the wall.”
Εικόνα 2: Ρεαλιστικό στυλ, σκηνή κατά τη διάρκεια της ημέρας.
Εικόνα 3: Αλλαγή σε σκηνή νύχτας και προσθήκη στην εντολή: «Φώτα και φανάρια στον τοίχο».
Creating images with artificial intelligence from a designer’s perspective
Today, artificial intelligence appears in almost every stage of the design process.
At Studio Trend Interior, we use various software solutions – for visualizations, image creation, and technical documentation. That’s why it’s particularly useful when a well-known design program such as ARCHLine.XP includes image creation with artificial intelligence as part of the design process.
ARCHLine.XP 2025
NEW EDITION
We are introducing the 2025 version of ARCHLine.XP, a leading BIM software used worldwide.


![Πέρασα στη λειτουργία Exact για να εμφανιστεί η κουρτίνα, αλλά το αποτέλεσμα δεν ήταν ακόμα τέλειο. Έτσι, διέγραψα την κουρτίνα και χρησιμοποίησα δημιουργικές λειτουργίες για να δοκιμάσω διαφορετικά στυλ.[1] Πέρασα στη λειτουργία Exact για να εμφανιστεί η κουρτίνα, αλλά το αποτέλεσμα δεν ήταν ακόμα τέλειο. Έτσι, διέγραψα την κουρτίνα και χρησιμοποίησα δημιουργικές λειτουργίες για να δοκιμάσω διαφορετικά στυλ.](https://www.ace-hellas.gr/wp-content/uploads/2025/08/ARCHLineXP_Ai_Render_AranyiKlaudia_fHD_031.jpg)
![Δοκίμασα τα ακόλουθα στυλ: 4. Βιοφιλικό[1] Δοκίμασα τα ακόλουθα στυλ: 4. Βιοφιλικό](https://www.ace-hellas.gr/wp-content/uploads/2025/08/ARCHLineXP_Ai_Render_AranyiKlaudia_fHD_041.jpg)
![Δοκίμασα τα ακόλουθα στυλ: 5. Μοντέρνο[1] Δοκίμασα τα ακόλουθα στυλ: 5. Μοντέρνο](https://www.ace-hellas.gr/wp-content/uploads/2025/08/ARCHLineXP_Ai_Render_AranyiKlaudia_fHD_051.jpg)
![Δοκίμασα τα ακόλουθα στυλ: 7. Μοντέρνο ξανά.[1] Δοκίμασα τα ακόλουθα στυλ: 7. Μοντέρνο ξανά.](https://www.ace-hellas.gr/wp-content/uploads/2025/08/ARCHLineXP_Ai_Render_AranyiKlaudia_fHD_071.jpg)
![Δοκίμασα ξανά την κουρτίνα, προσθέτοντας αυτή τη φορά μια υπόδειξη: «Παράθυρο στα αριστερά με διαφανή κουρτίνα».[1] Δοκίμασα ξανά την κουρτίνα, προσθέτοντας αυτή τη φορά μια υπόδειξη: «Παράθυρο στα αριστερά με διαφανή κουρτίνα».](https://www.ace-hellas.gr/wp-content/uploads/2025/08/ARCHLineXP_Ai_Render_AranyiKlaudia_fHD_081.jpg)
![Το μοντέλο που δημιουργήθηκε στο ARCHLine.XP.[1] Το μοντέλο που δημιουργήθηκε στο ARCHLine.XP.](https://www.ace-hellas.gr/wp-content/uploads/2025/08/ARCHLineXP_Ai_Render_AranyiKlaudia_fHD_I_011.jpg)
![Απεικονίζεται σε Exact mode, Modern style, με τις ίδιες προτροπές.[1] Απεικονίζεται σε Exact mode, Modern style, με τις ίδιες προτροπές.](https://www.ace-hellas.gr/wp-content/uploads/2025/08/ARCHLineXP_Ai_Render_AranyiKlaudia_fHD_I_031.jpg)
